


Cookies Removal Guide
Fix login issues on the Vizman dashboard by clearing site data in your browser.
Overview
Follow the steps in this guide only when you experience a login issue in your browser while accessing the Vizman dashboard. The steps explain how to clear the cookies and site data stored by your browser for Vizman, which usually resolves such issues.
Choose the section that matches the browser you use:
| Browser | Where to start | Reload shortcut |
|---|---|---|
| Google Chrome | Site information icon, left of the address bar | Ctrl + Shift + R (Windows) Cmd + Shift + R (Mac) |
| Microsoft Edge | Site information icon, left of the address bar | Ctrl + Shift + R |
| Safari (Mac) | Safari menu > Settings > Privacy | Command + R |
| Mozilla Firefox | Shield / padlock icon, left of the address bar | Ctrl + Shift + R (Windows) Cmd + Shift + R (Mac) |
Note
This guide applies to the Vizman dashboard login page at https://dashboard.vizman.app/Authentication. Menu names may differ slightly depending on your browser version. In every screenshot, the red box or red arrow shows exactly what to click.
Before you begin
Clearing site data signs you out of Vizman. Have your login details ready, because you will need to sign in again at the end.
Google Chrome
Open Google Chrome and go to https://dashboard.vizman.app/Authentication. Then follow the steps below in order.
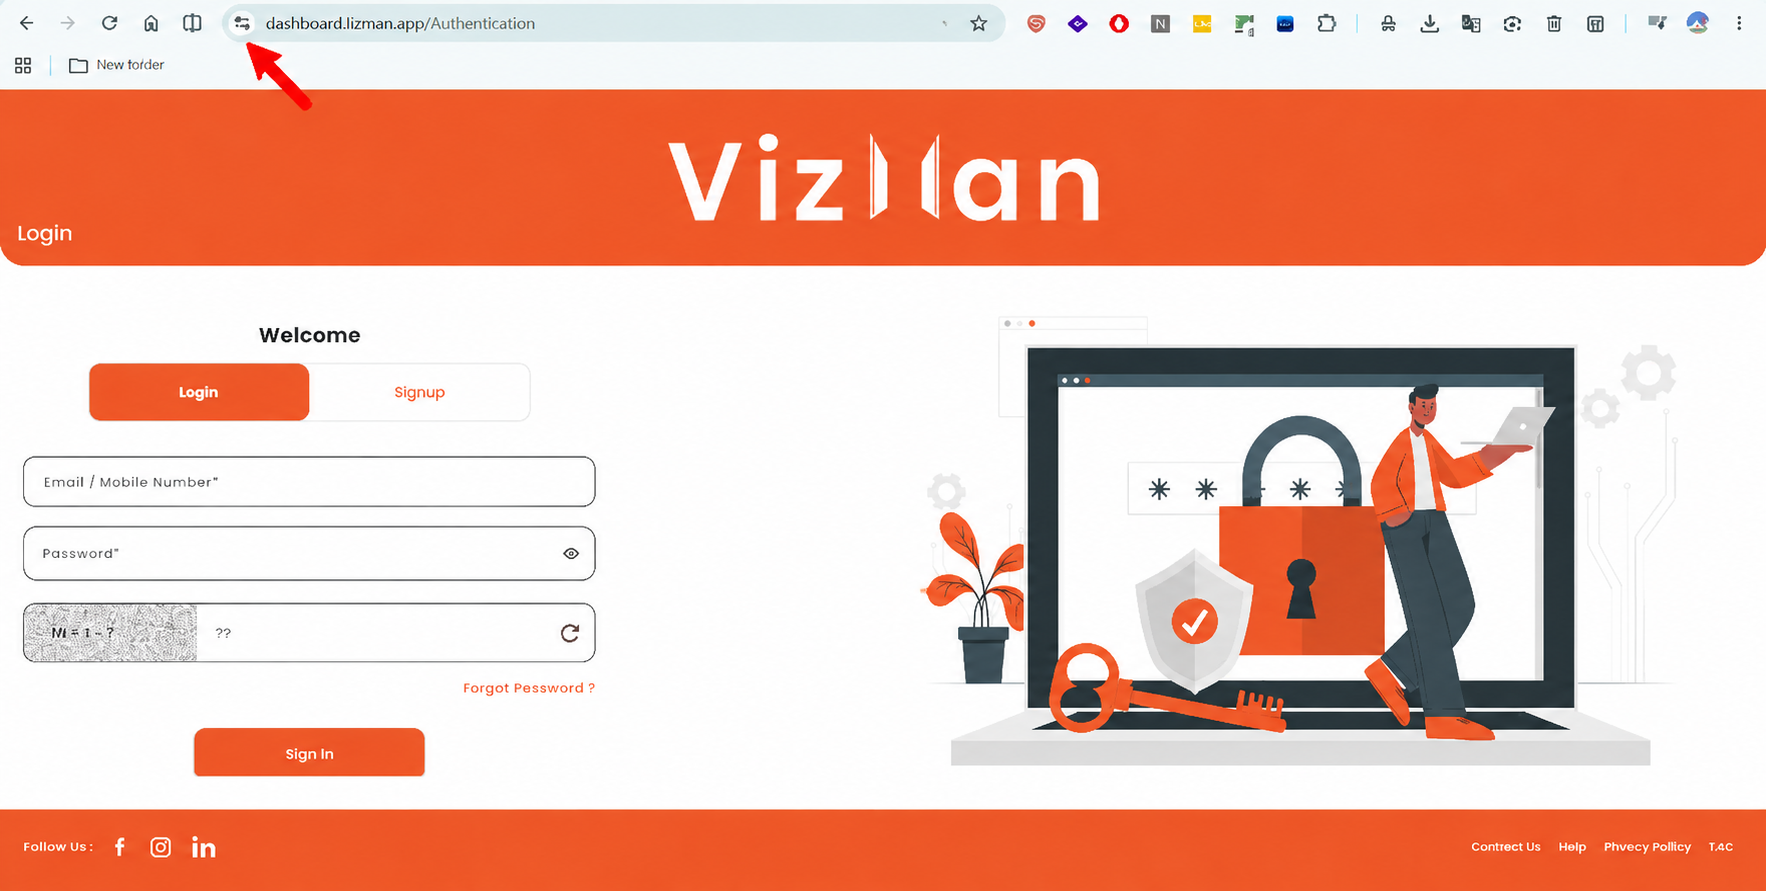
Step 1: Open the site information menu
Click the site information icon to the left of the address bar, indicated by the red arrow.
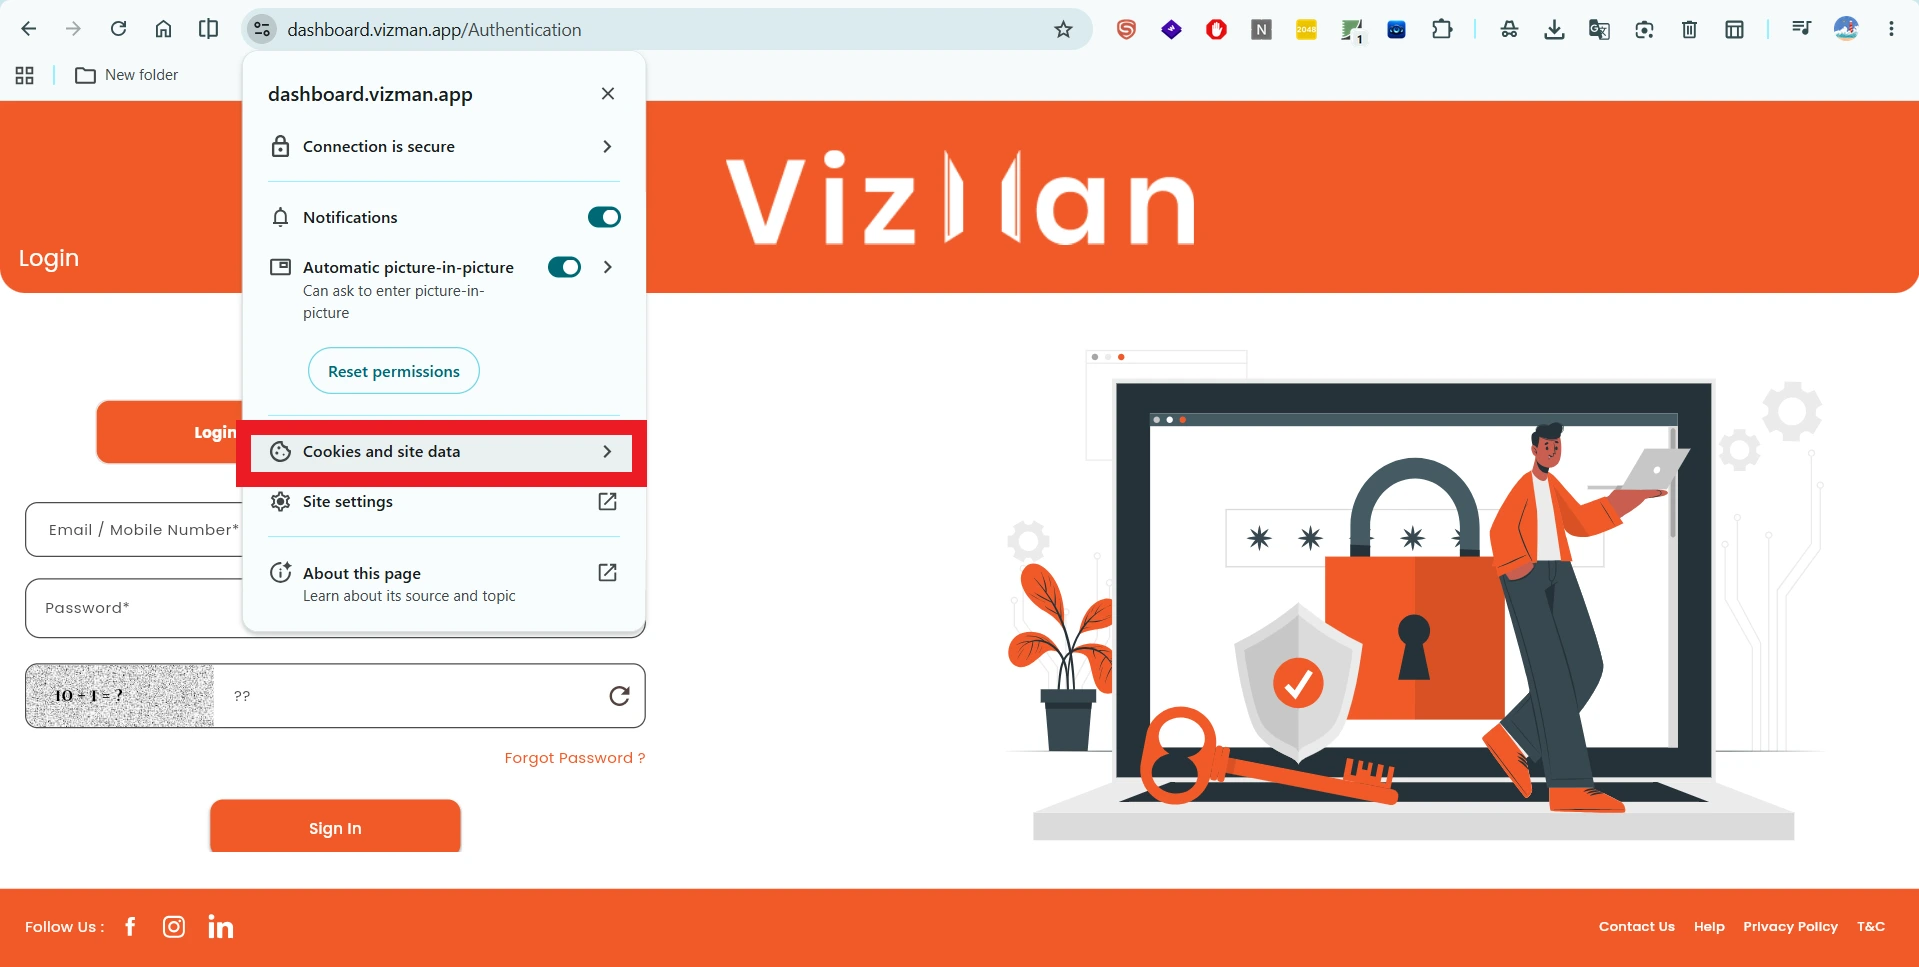
Step 2: Select Cookies and site data
In the menu that opens, click Cookies and site data.
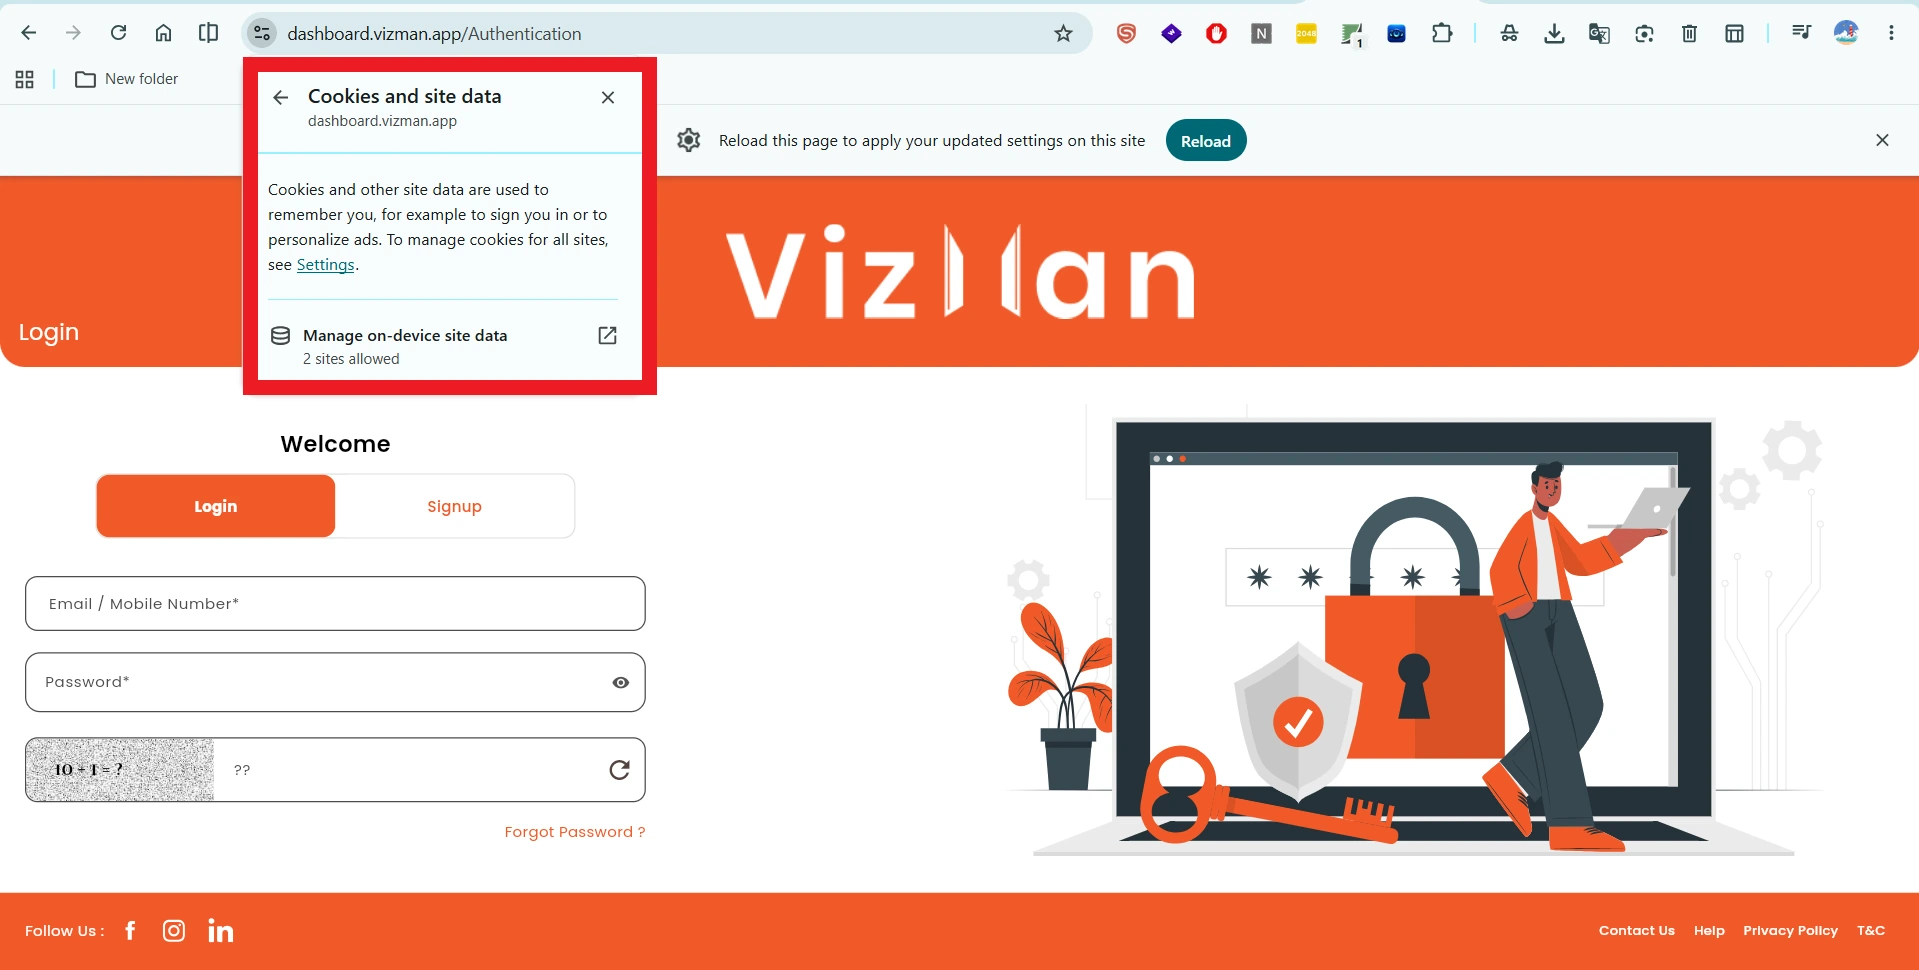
Step 3: Open the on-device site data
In the Cookies and site data panel for dashboard.vizman.app, click Manage on-device site data.
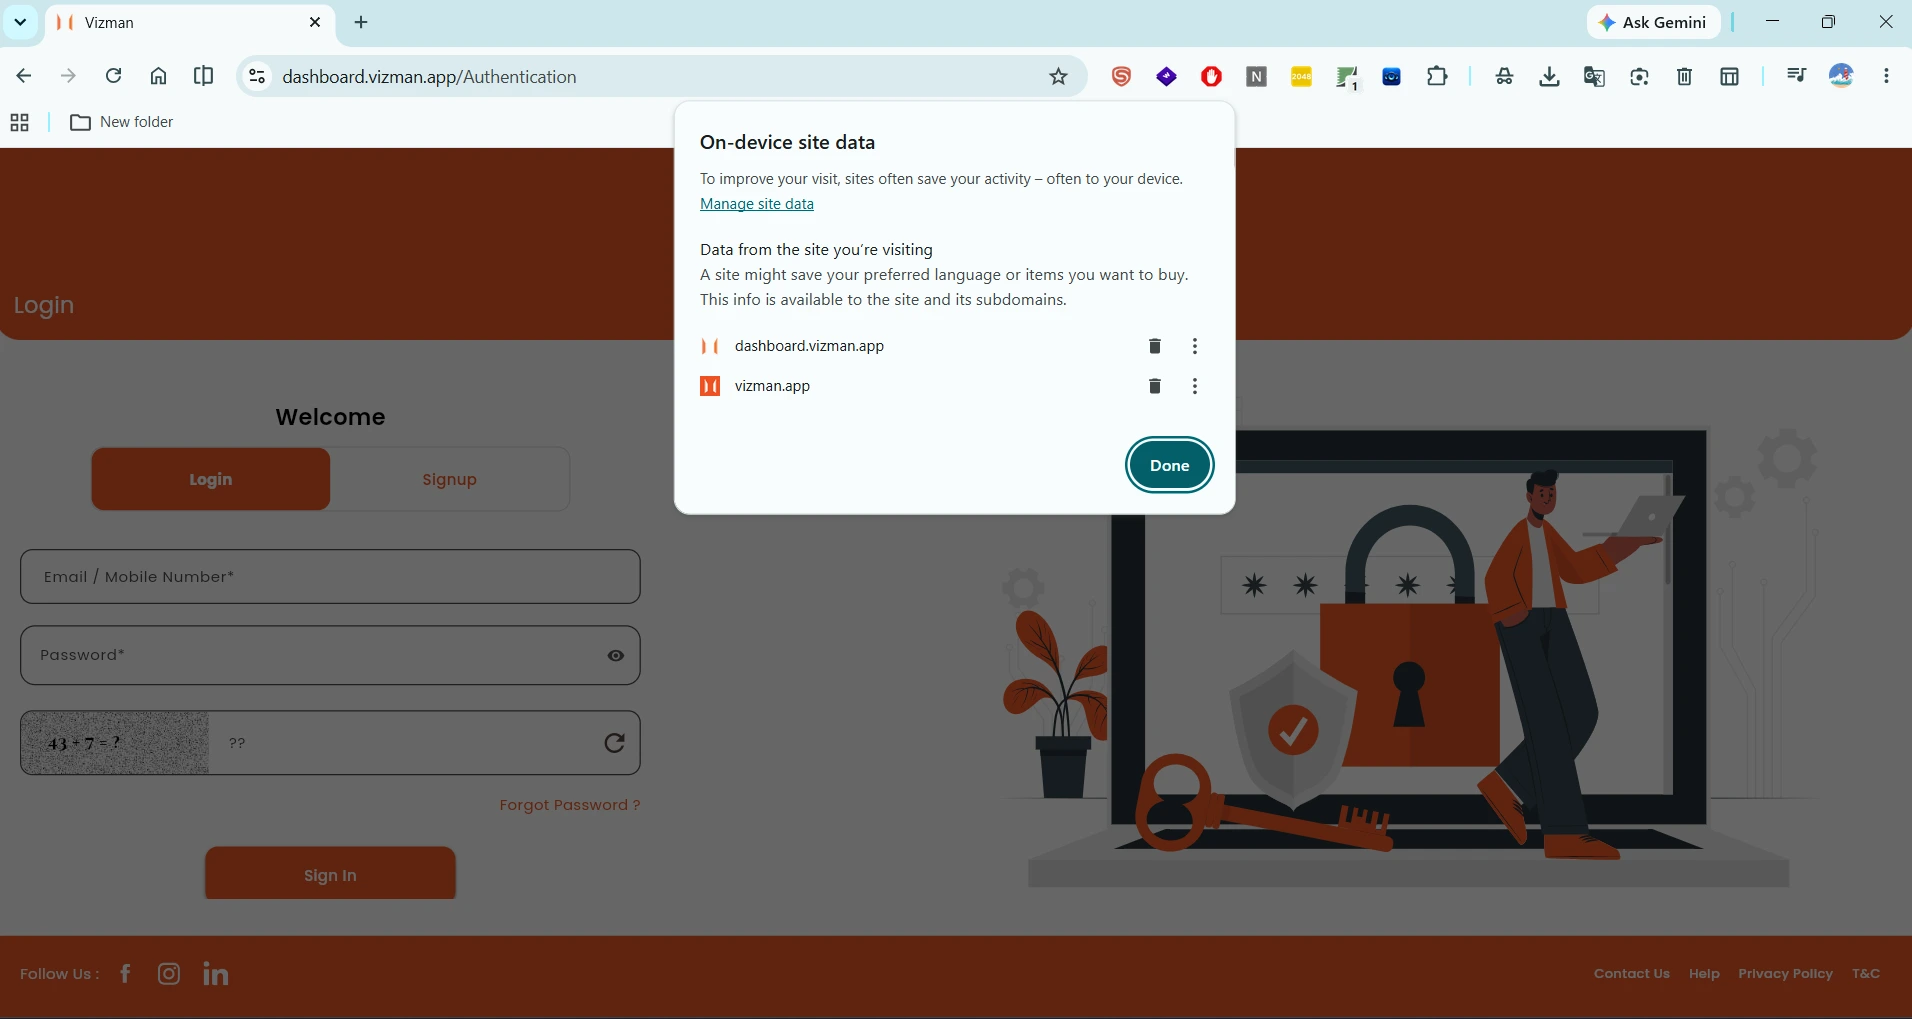
Step 4: Delete the stored data
In the On-device site data window, click the delete (bin) icon beside each of the two entries, dashboard.vizman.app and vizman.app. Then click Done.
Step 5: Reload the page
Reload the login page, or perform a hard refresh by pressing Ctrl + Shift + R (Windows) or Command + Shift + R (Mac).
Microsoft Edge
Open Microsoft Edge and go to https://dashboard.vizman.app/Authentication. Then follow the steps below in order.
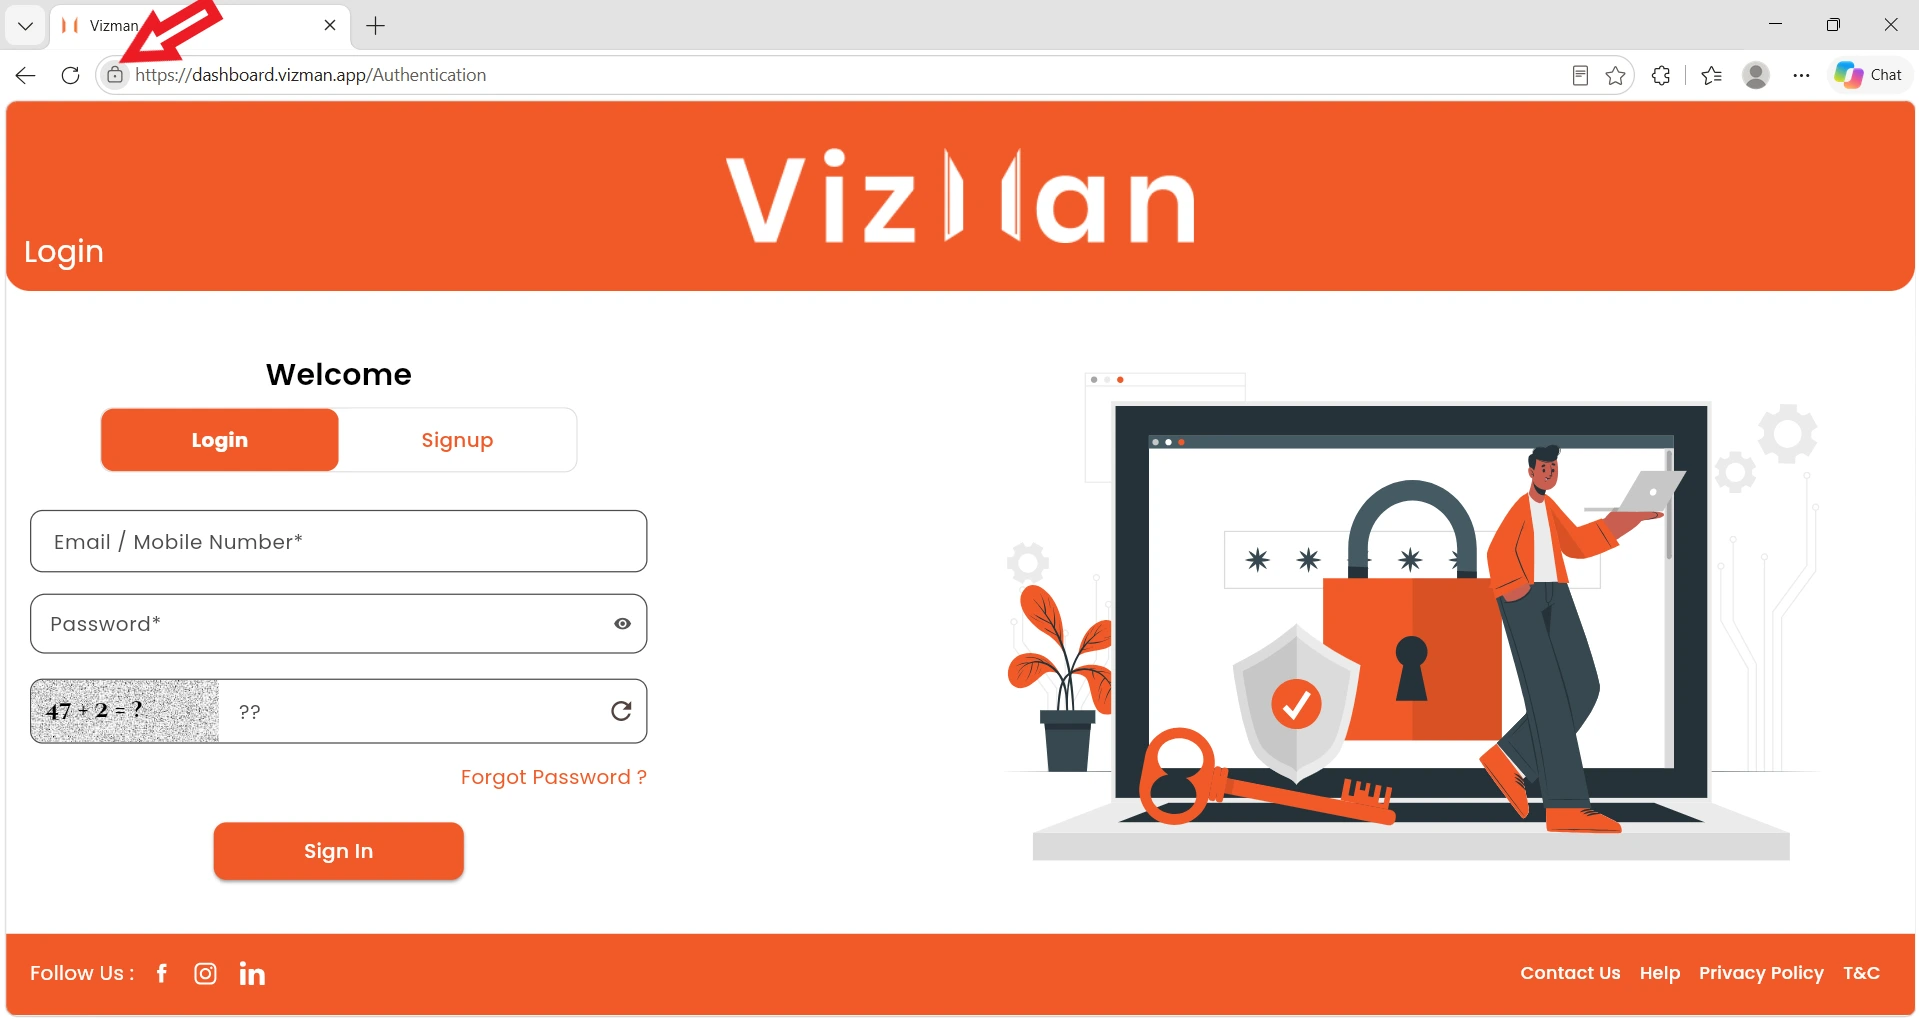
Step 1 Open the site information menu
Click the site information icon to the left of the address bar, indicated by the red arrow.
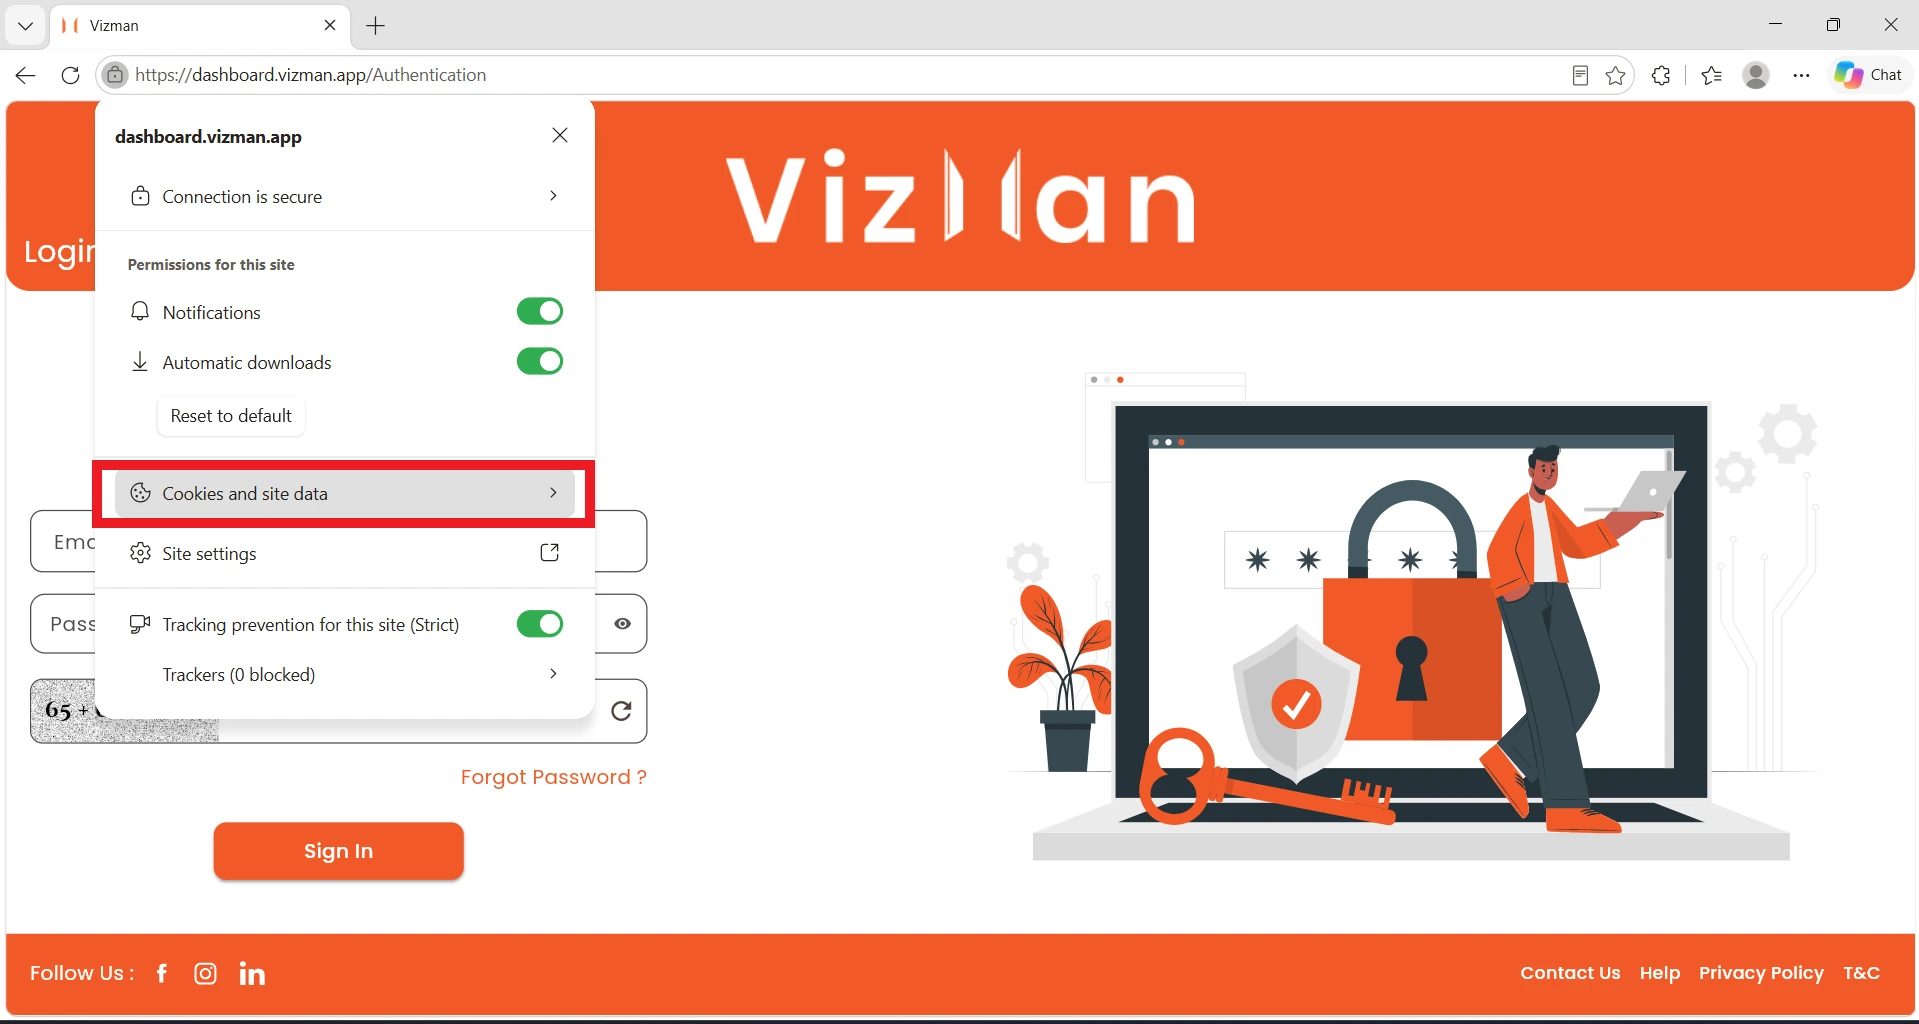
Step 2 Select Cookies and site data
In the menu that opens, click Cookies and site data.
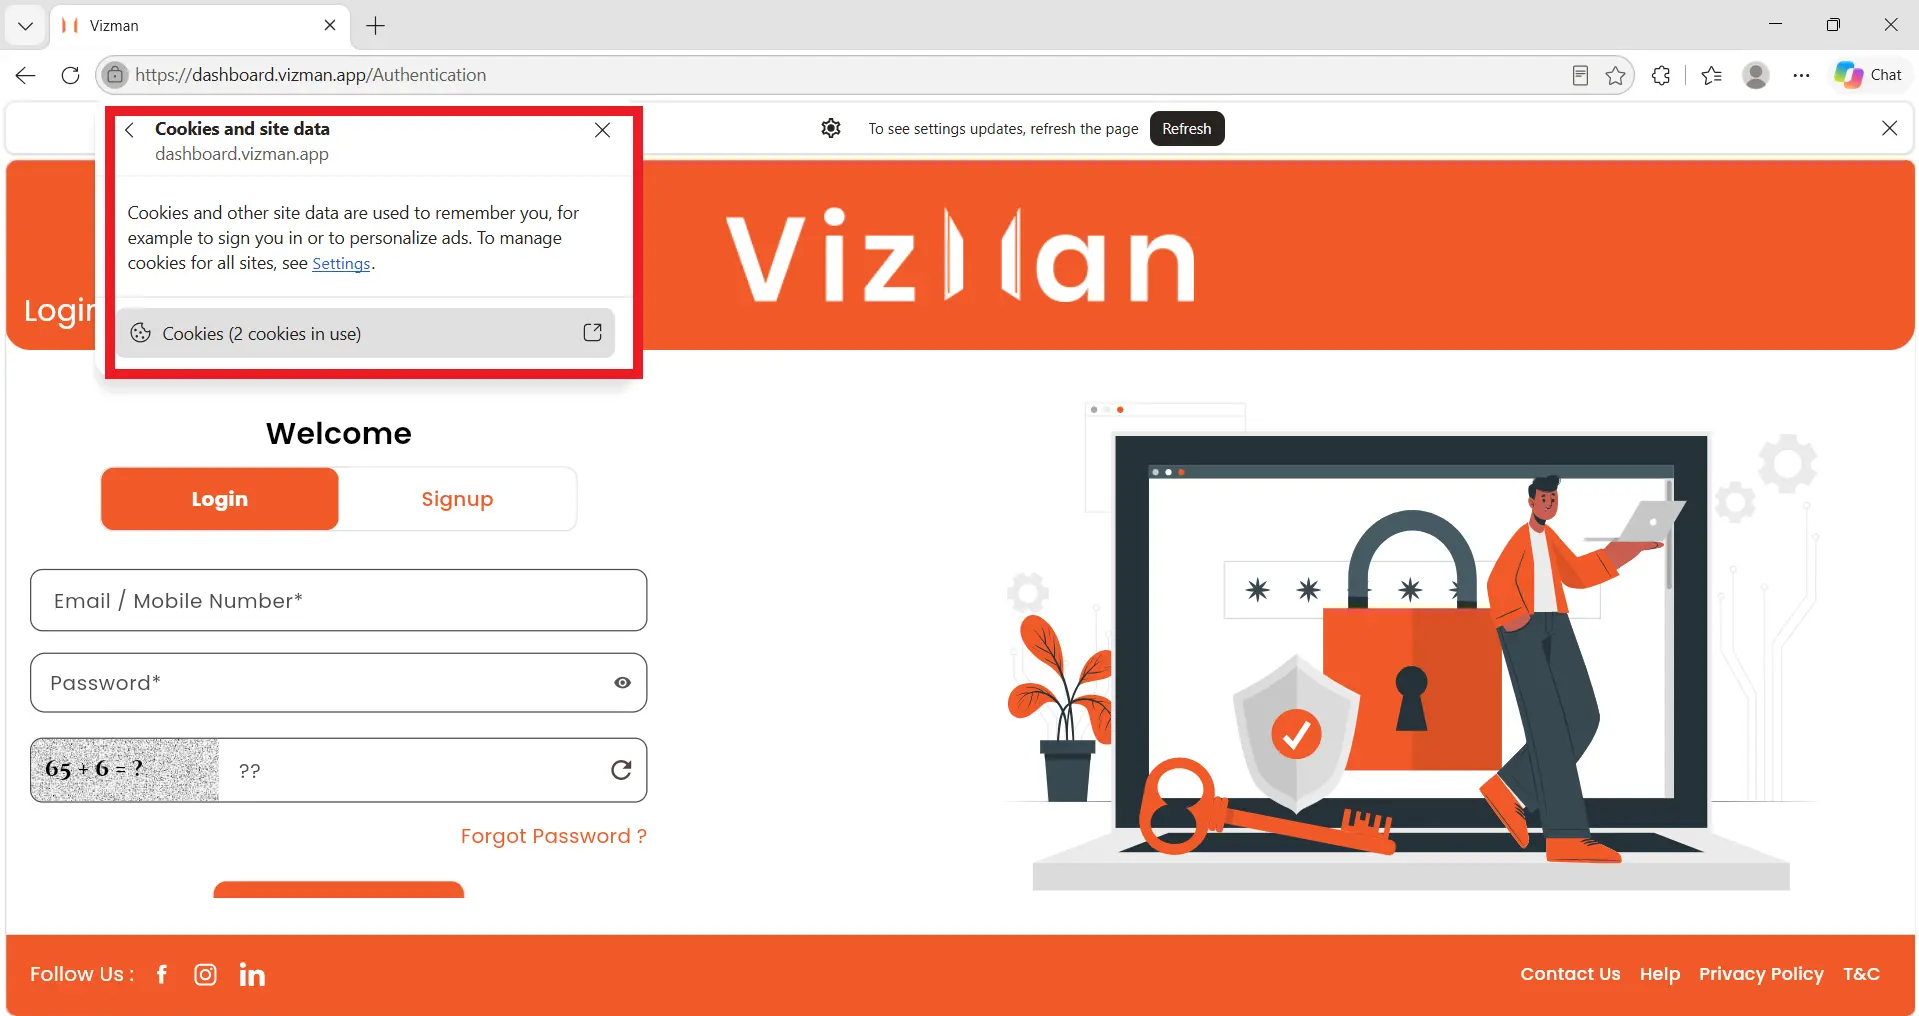
Step 3 Open the cookies list
Click Cookies (2 cookies in use) to open the Cookies in use window.
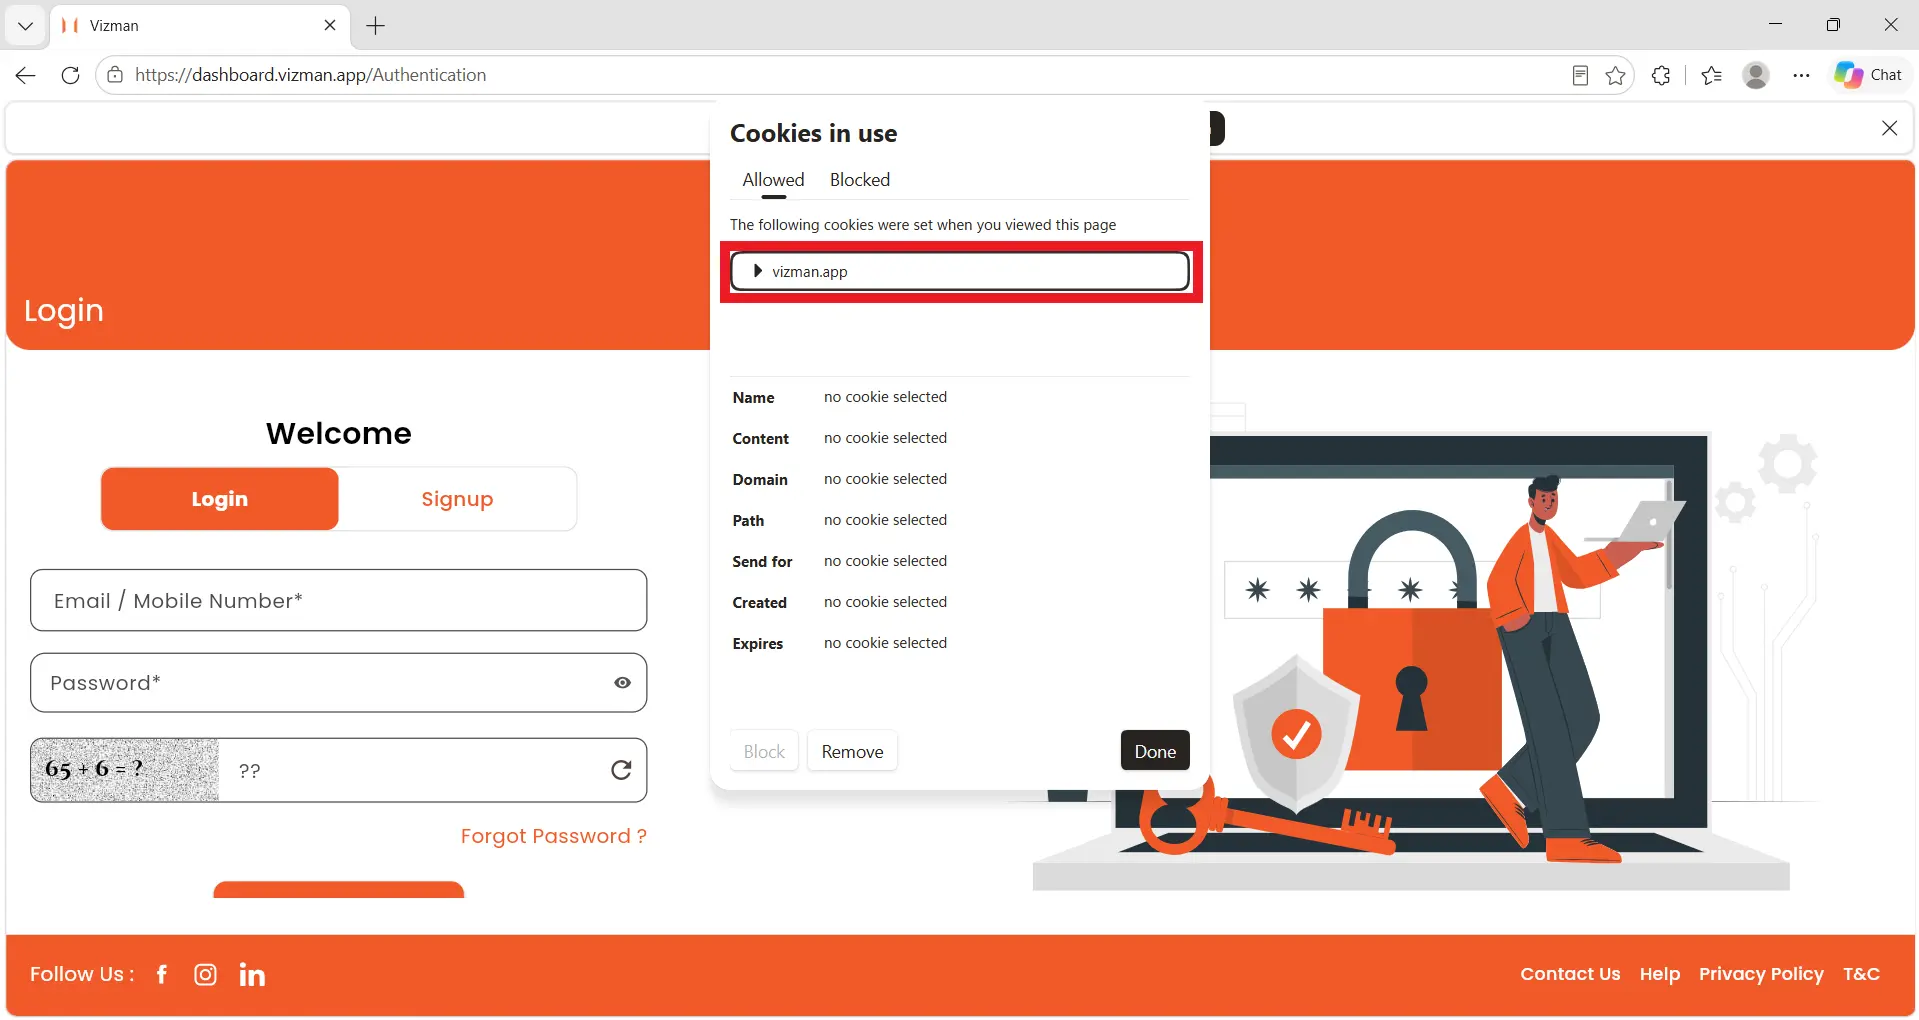
Step 4 Expand the Vizman entry
In the Cookies in use window, click vizman.app to expand it.
Step 5 Select a cookie
Expand the Cookies folder and click the cookie listed under it. Its details appear below the list.
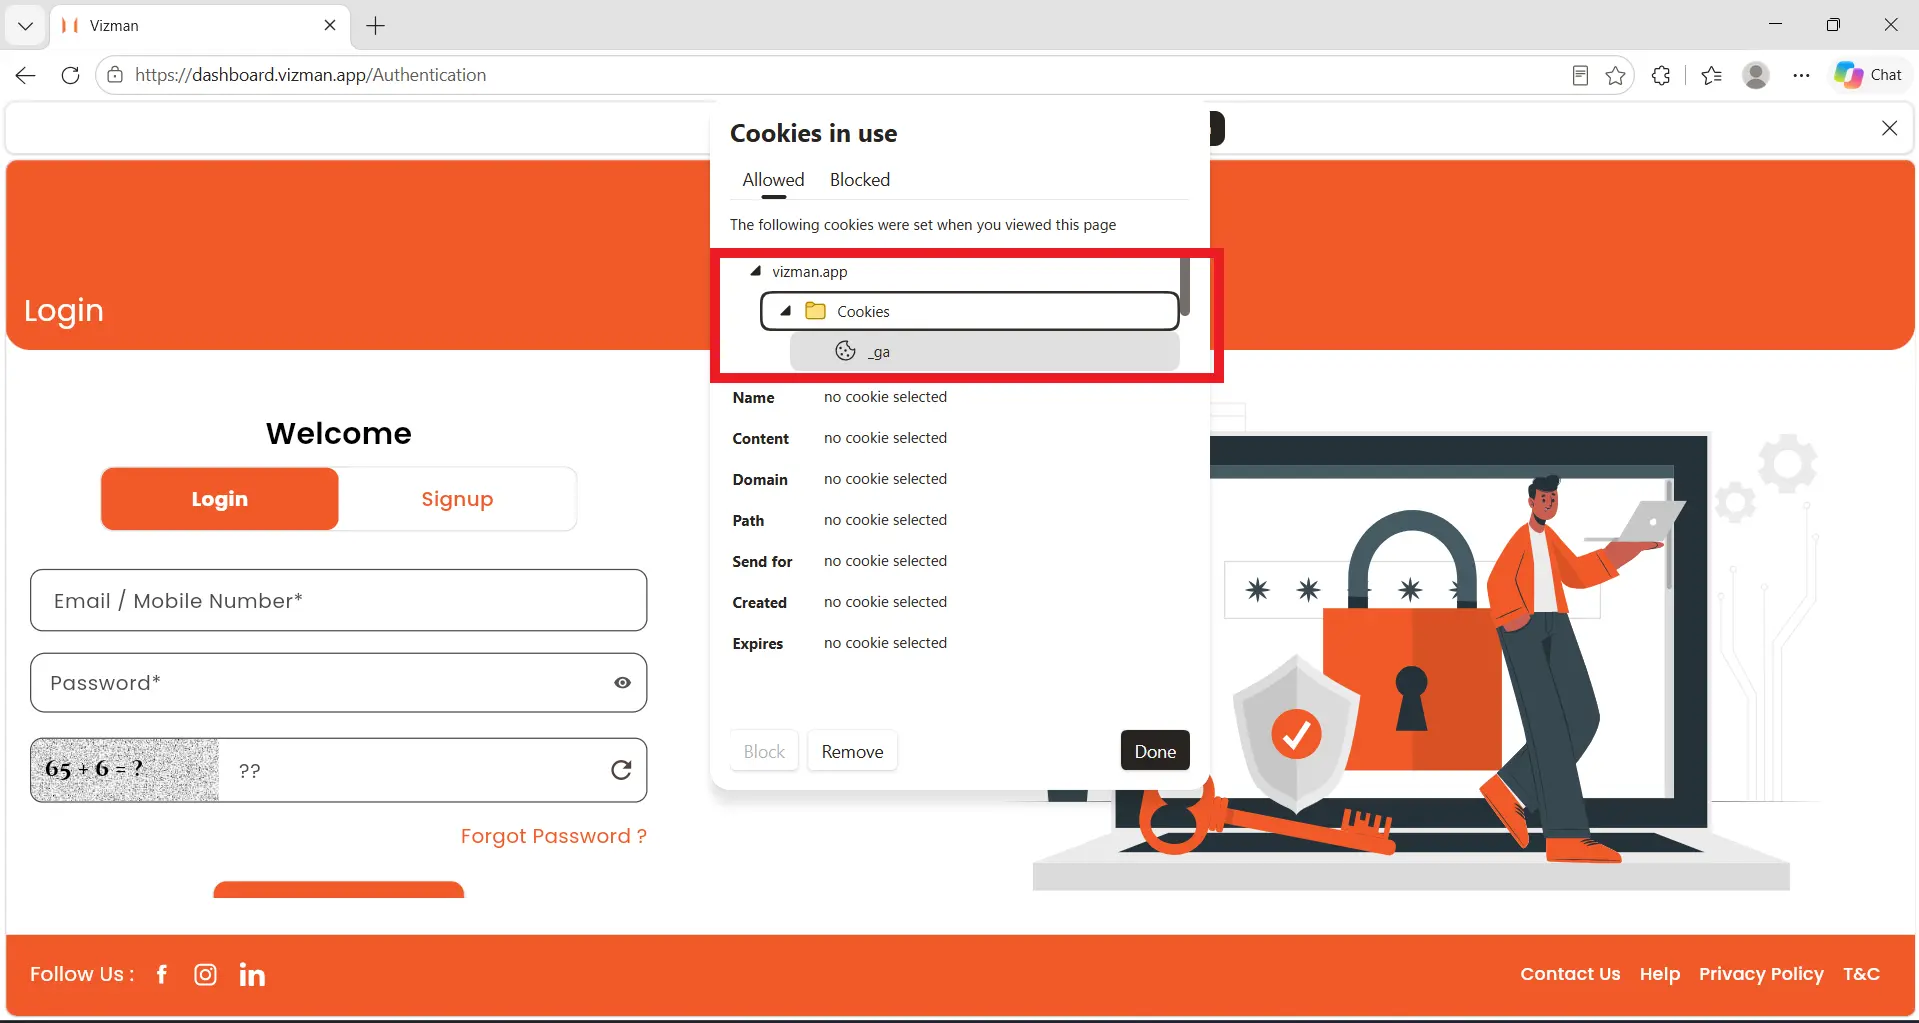
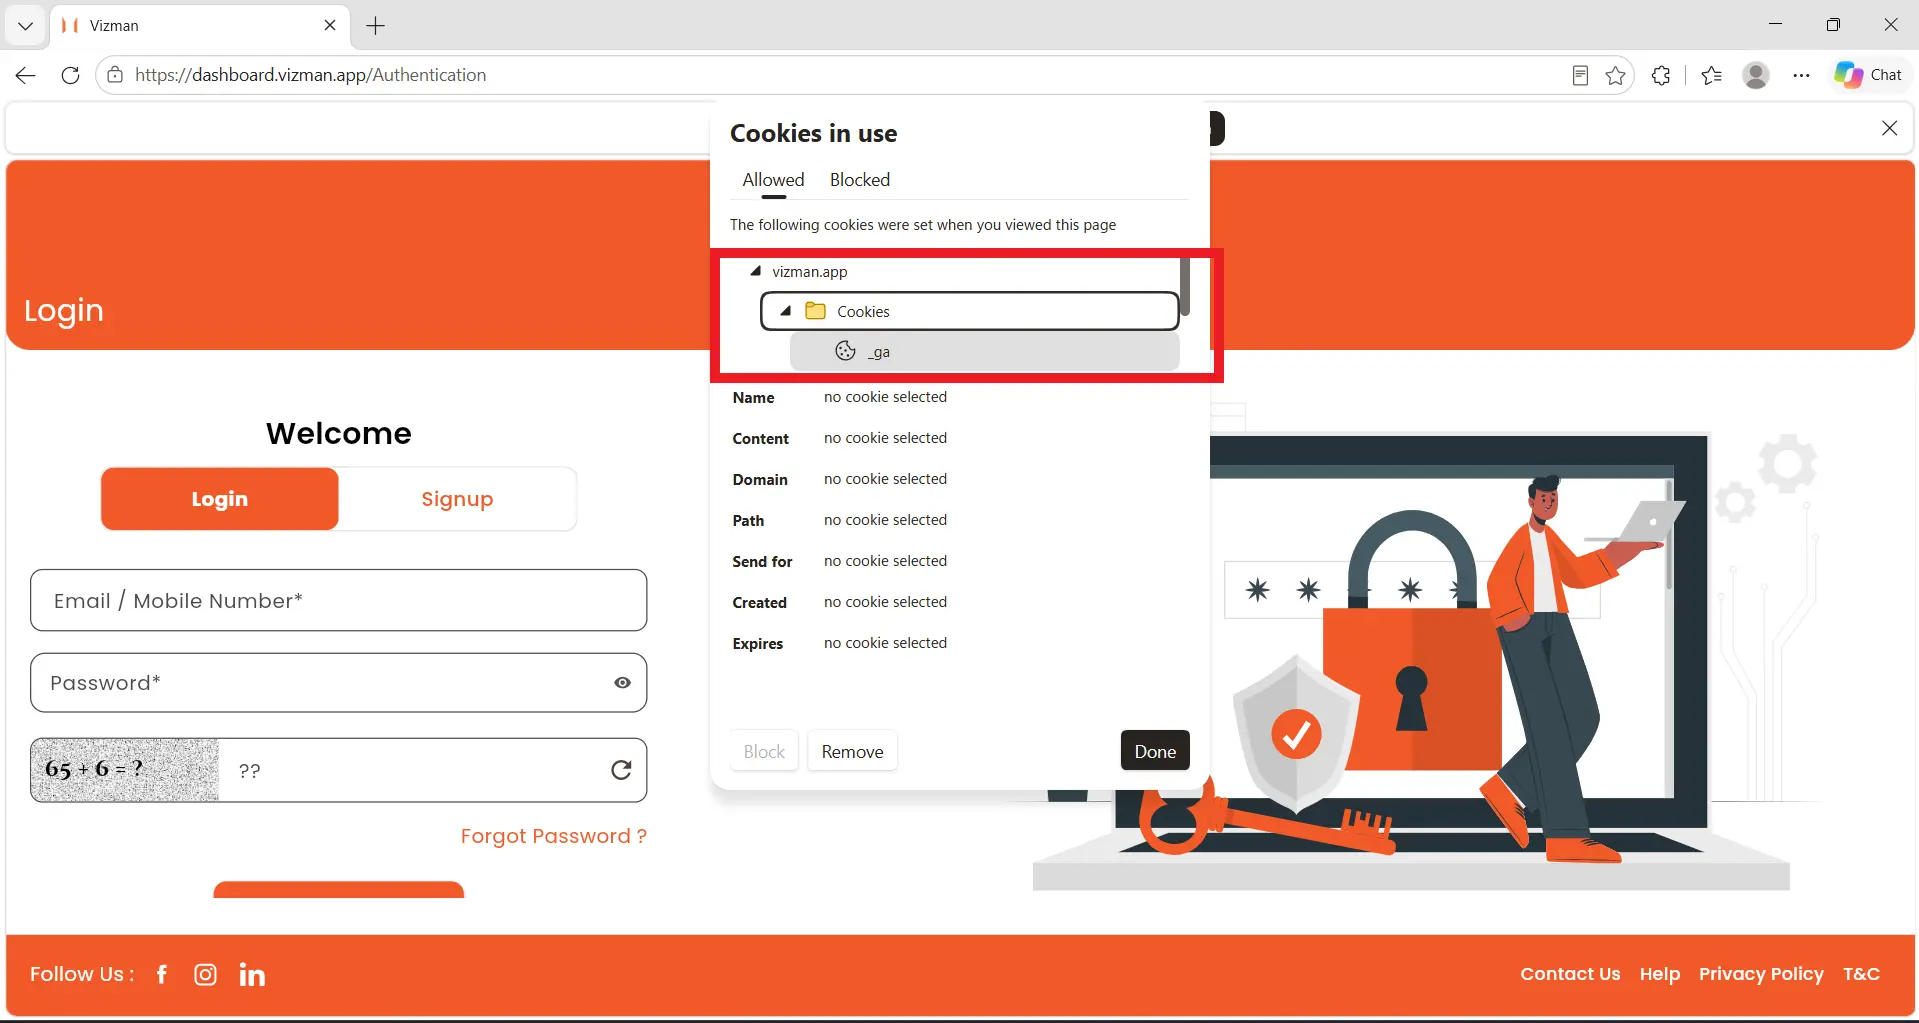
Step 6 Remove the cookies and click Done
Click Remove, and then click Done. Repeat this for any other Vizman entries in the list, such as dashboard.vizman.app.
Step 7 Reload the page
Return to the Vizman login page and reload it, or perform a hard refresh by pressing Ctrl + Shift + R.
Alternative method: from Edge Settings
If you prefer to clear everything from Edge Settings, use the steps below instead of Steps 1 to 6.
- Click the Settings and more icon (three dots) in the top-right corner of the browser, and then select Settings.
- Select Cookies and site permissions. (In some versions of Edge, this is found under Privacy, search, and services > Cookies.)
- Click Manage and delete cookies and site data, and then click See all cookies and site data.
- Type vizman in the search box to find the Vizman entries.
- Click Remove all shown to delete all the stored data for Vizman.
- Return to the Vizman login page and reload it, or perform a hard refresh by pressing Ctrl + Shift + R.
Safari
These steps apply to Safari on a Mac. Open Safari and go to https://dashboard.vizman.app/Authentication. Then follow the steps below in order.
Step 1: Open Safari Settings
In the menu bar at the top of the screen, click Safari and select Settings.
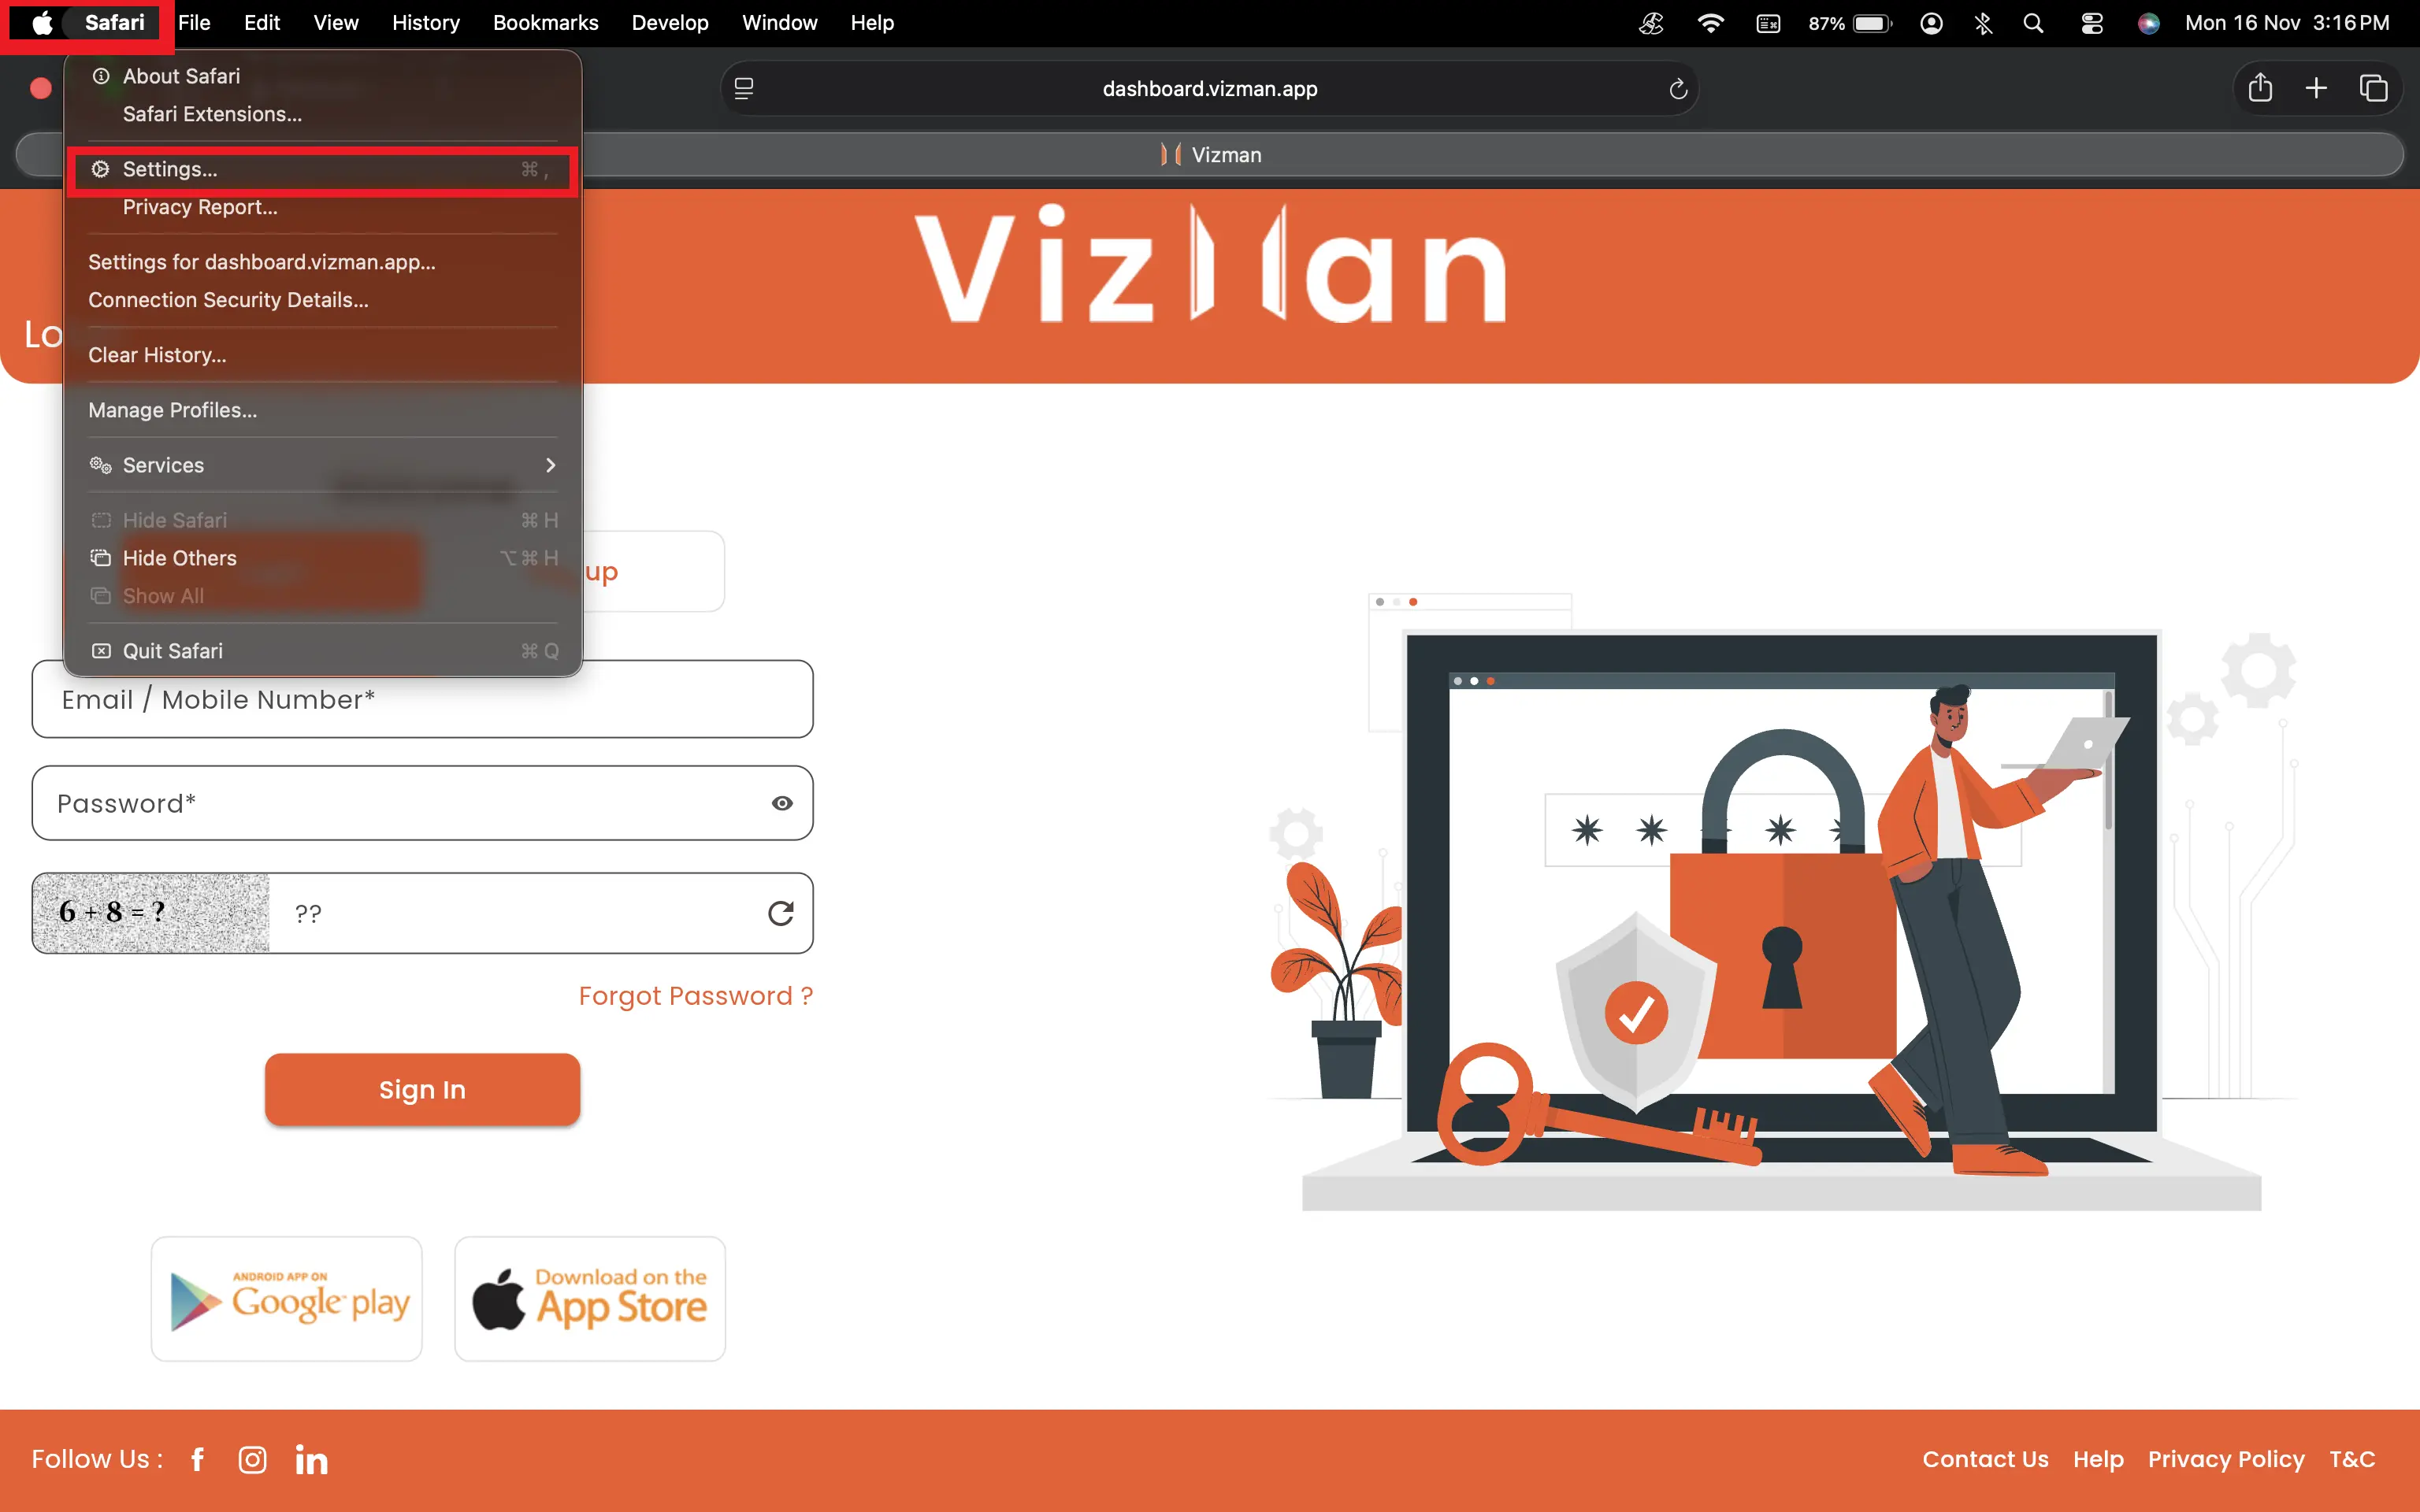
Step 2: Open Manage Website Data
Click the Privacy tab, and then click Manage Website Data. Wait for the list to load.
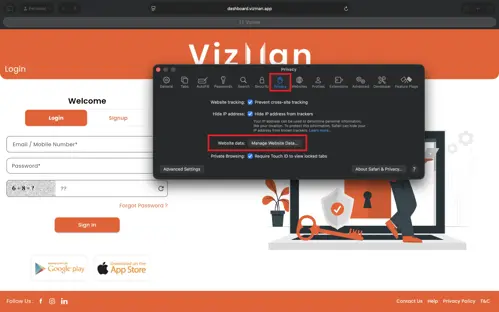
Step 3: Search for Vizman
Type vizman in the search box at the top-right of the window. Only the Vizman entries remain in the list.
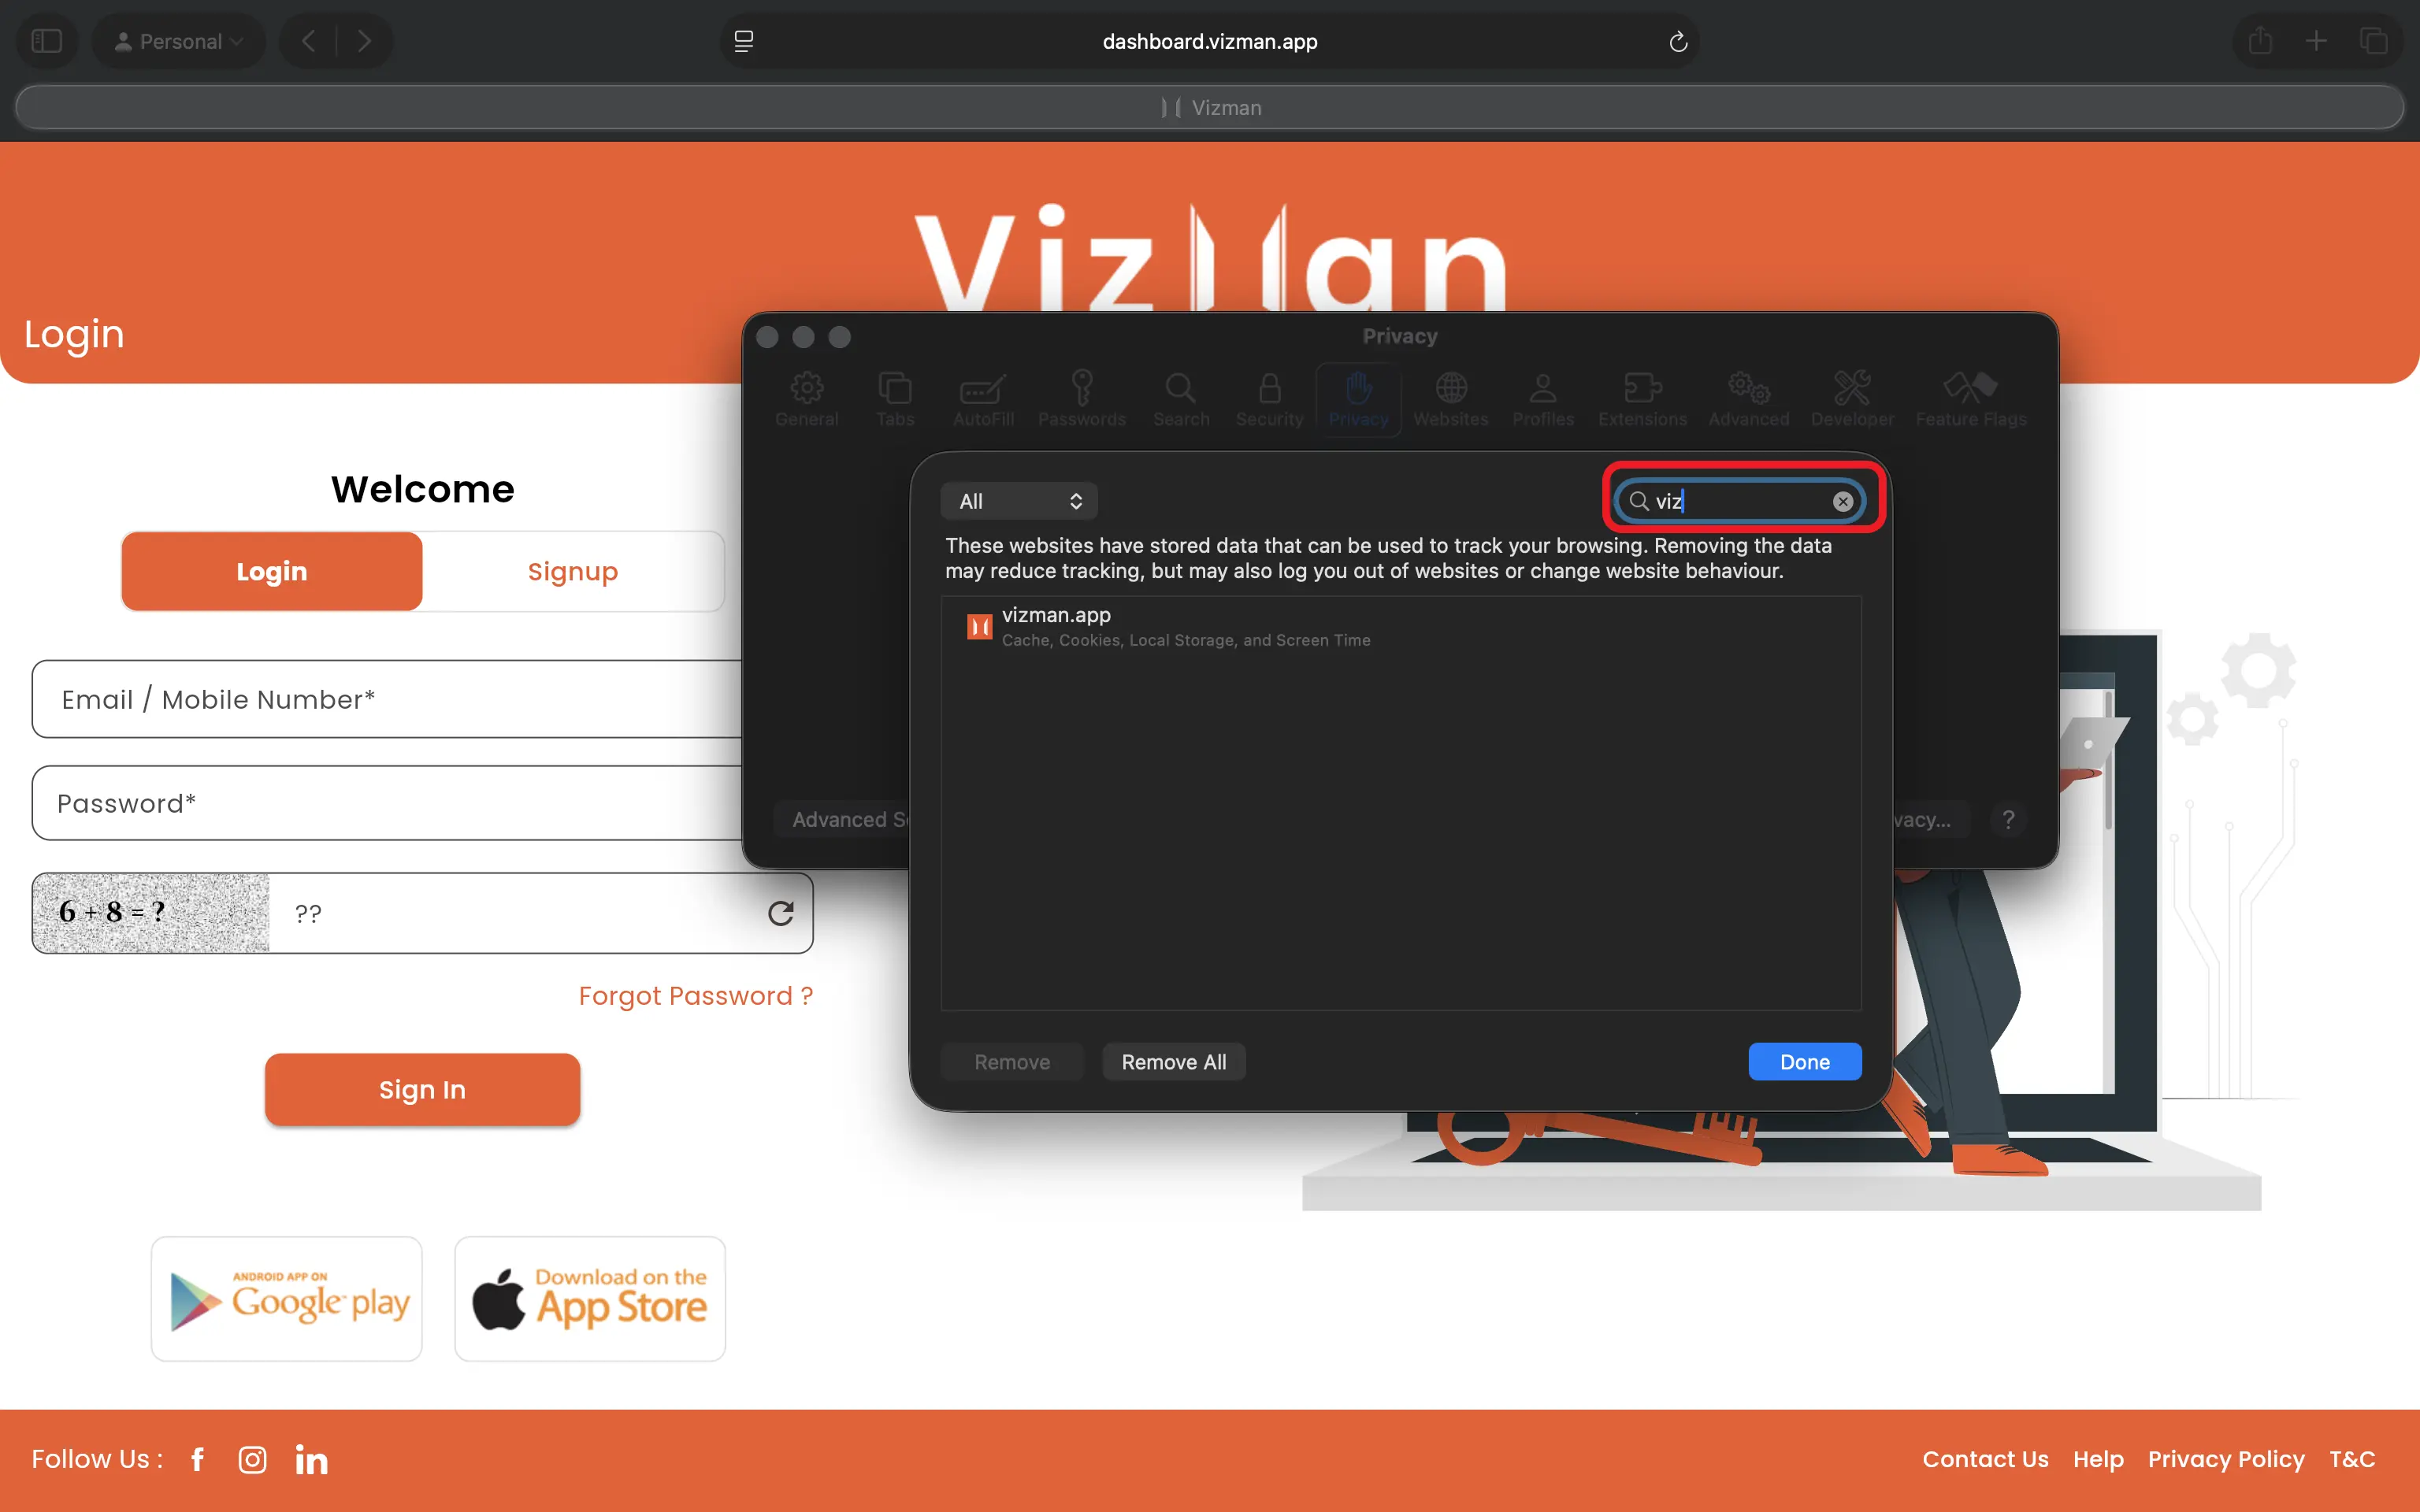
Step 4: Remove the Vizman data
Check that only Vizman entries are listed, and then click Remove All, as highlighted. Confirm if prompted, and then click Done.
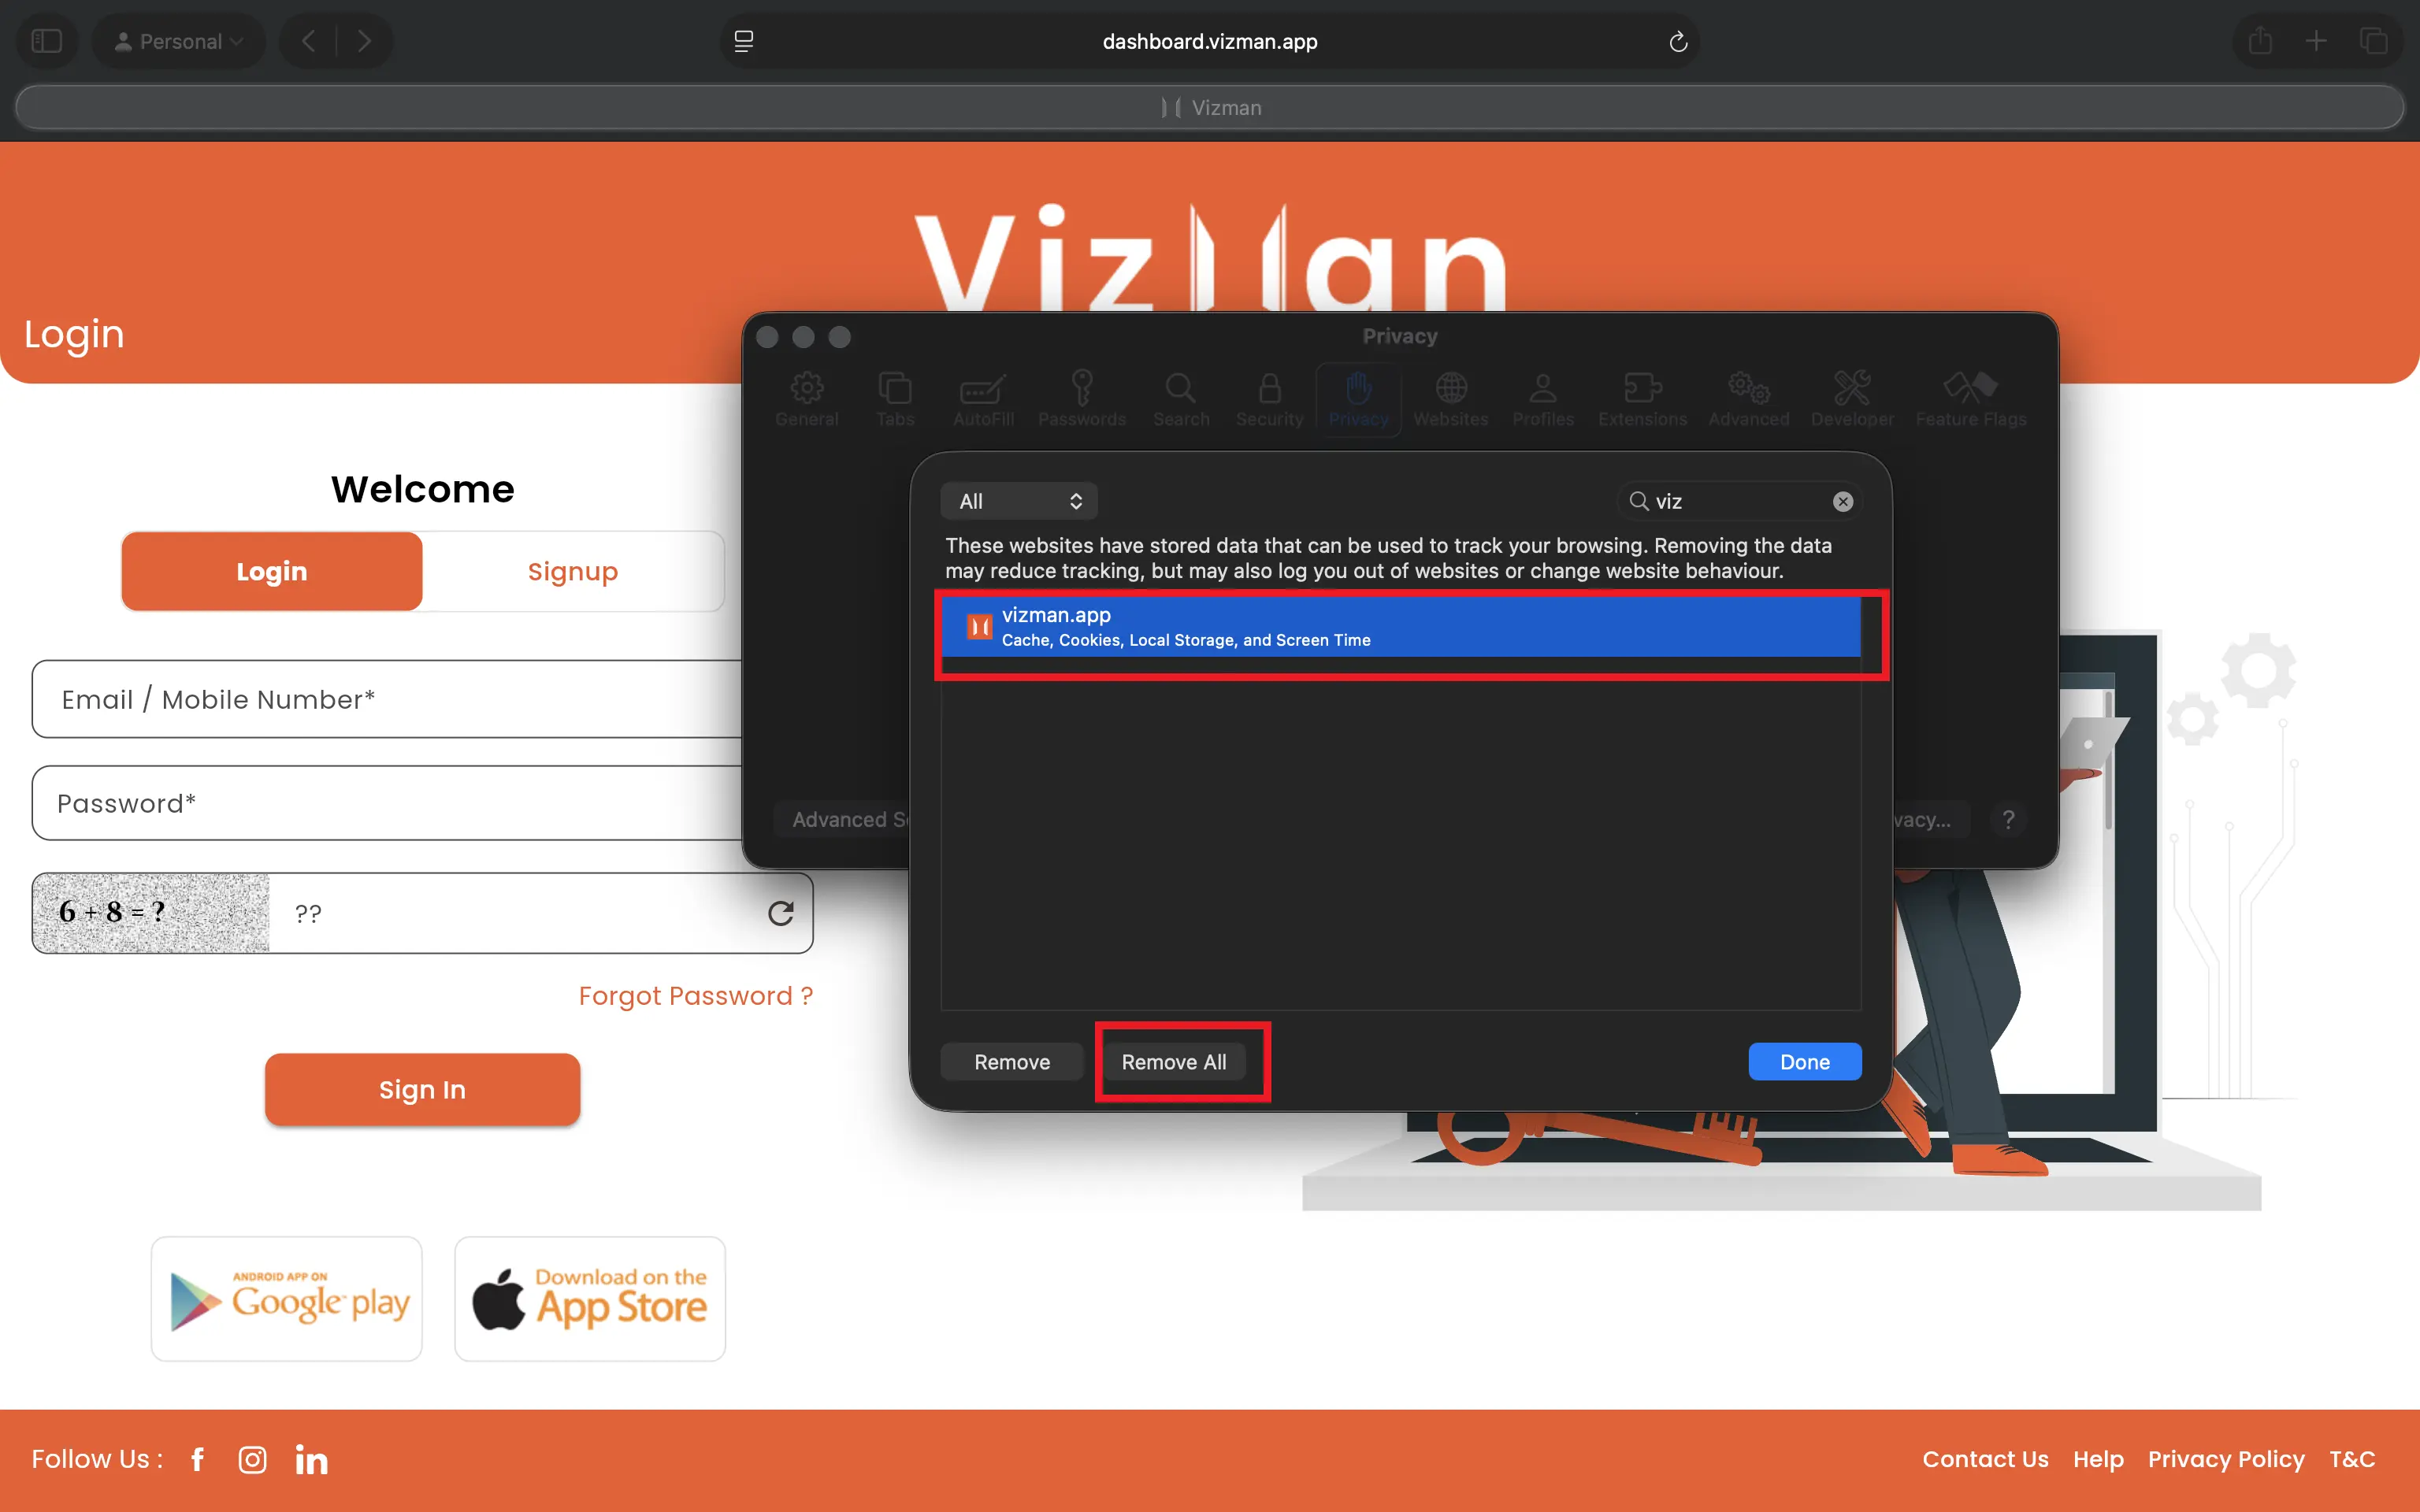
Step 5: Reload the page
Return to the Vizman login page and reload it by pressing Command + R.
Mozilla Firefox
Open Mozilla Firefox and go to https://dashboard.vizman.app/Authentication. You can use either of the two methods below.
Method 1: From the address bar (quickest)
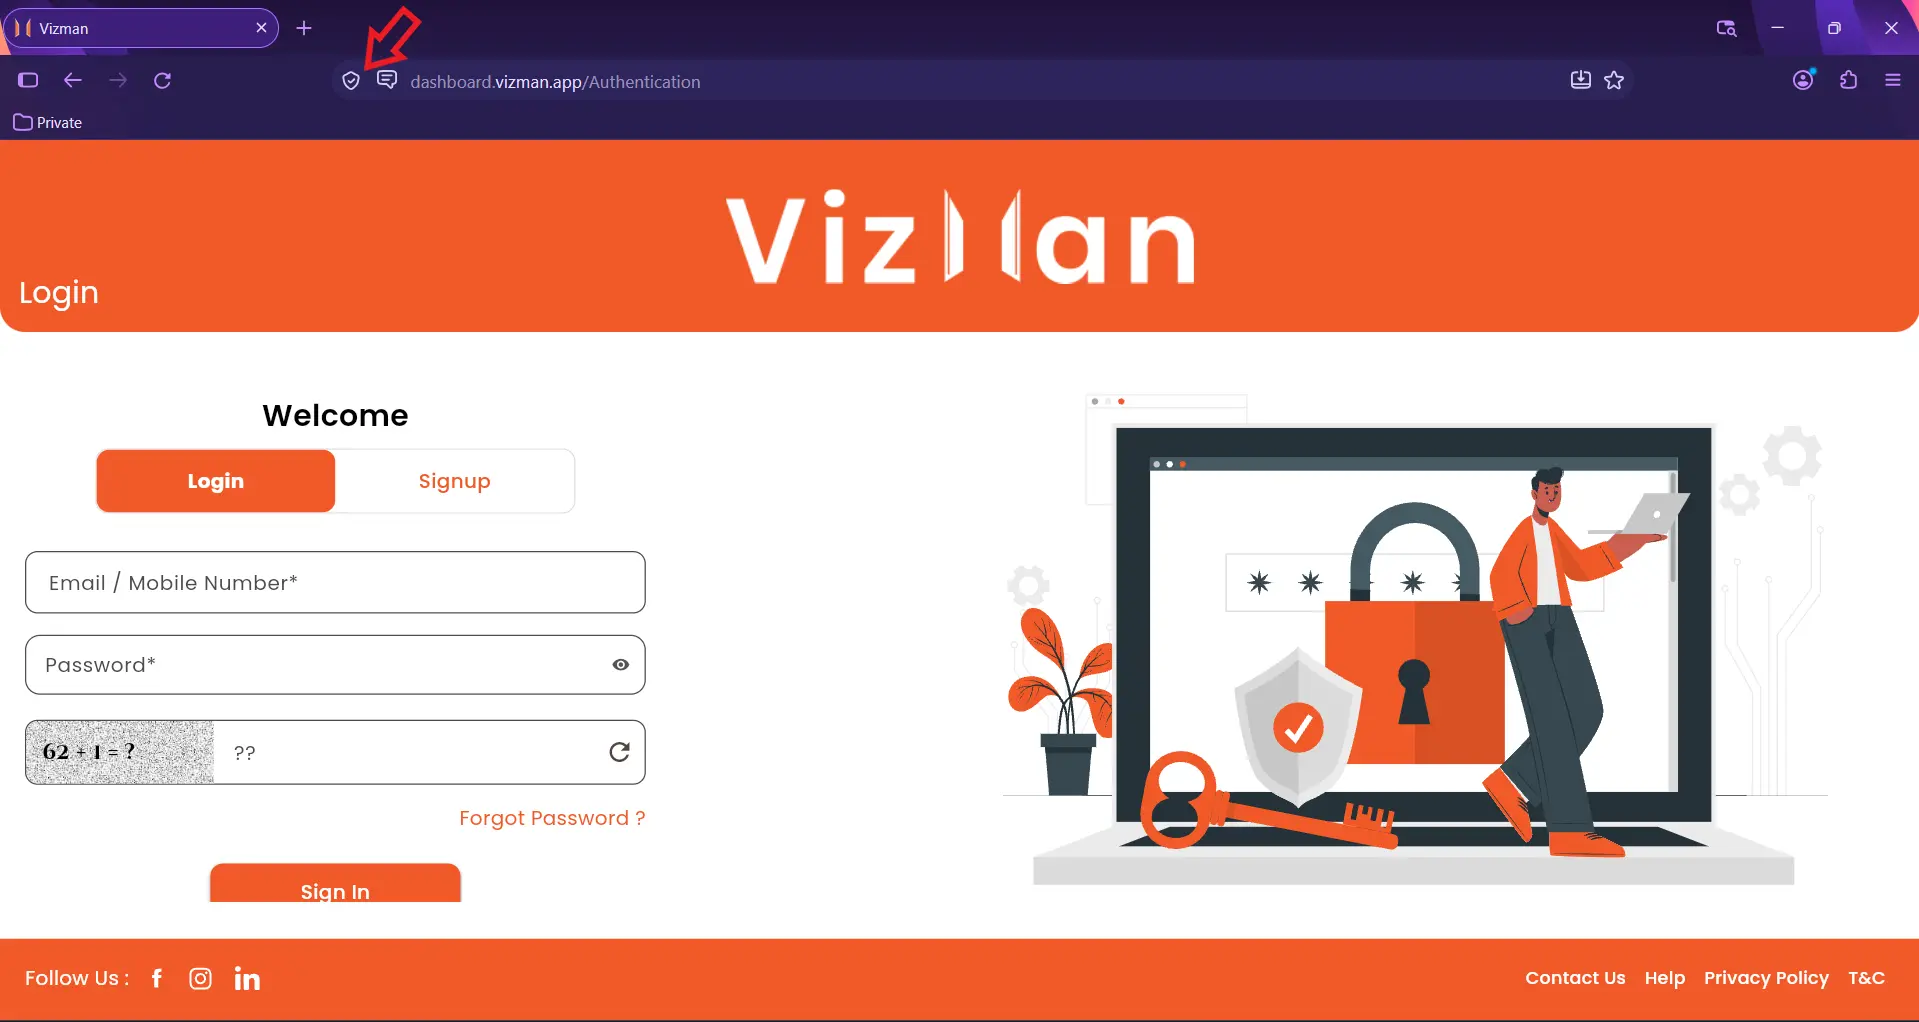
Step 1: Open the site information menu
Click the shield / padlock icon at the left end of the address bar, indicated by the red arrow.
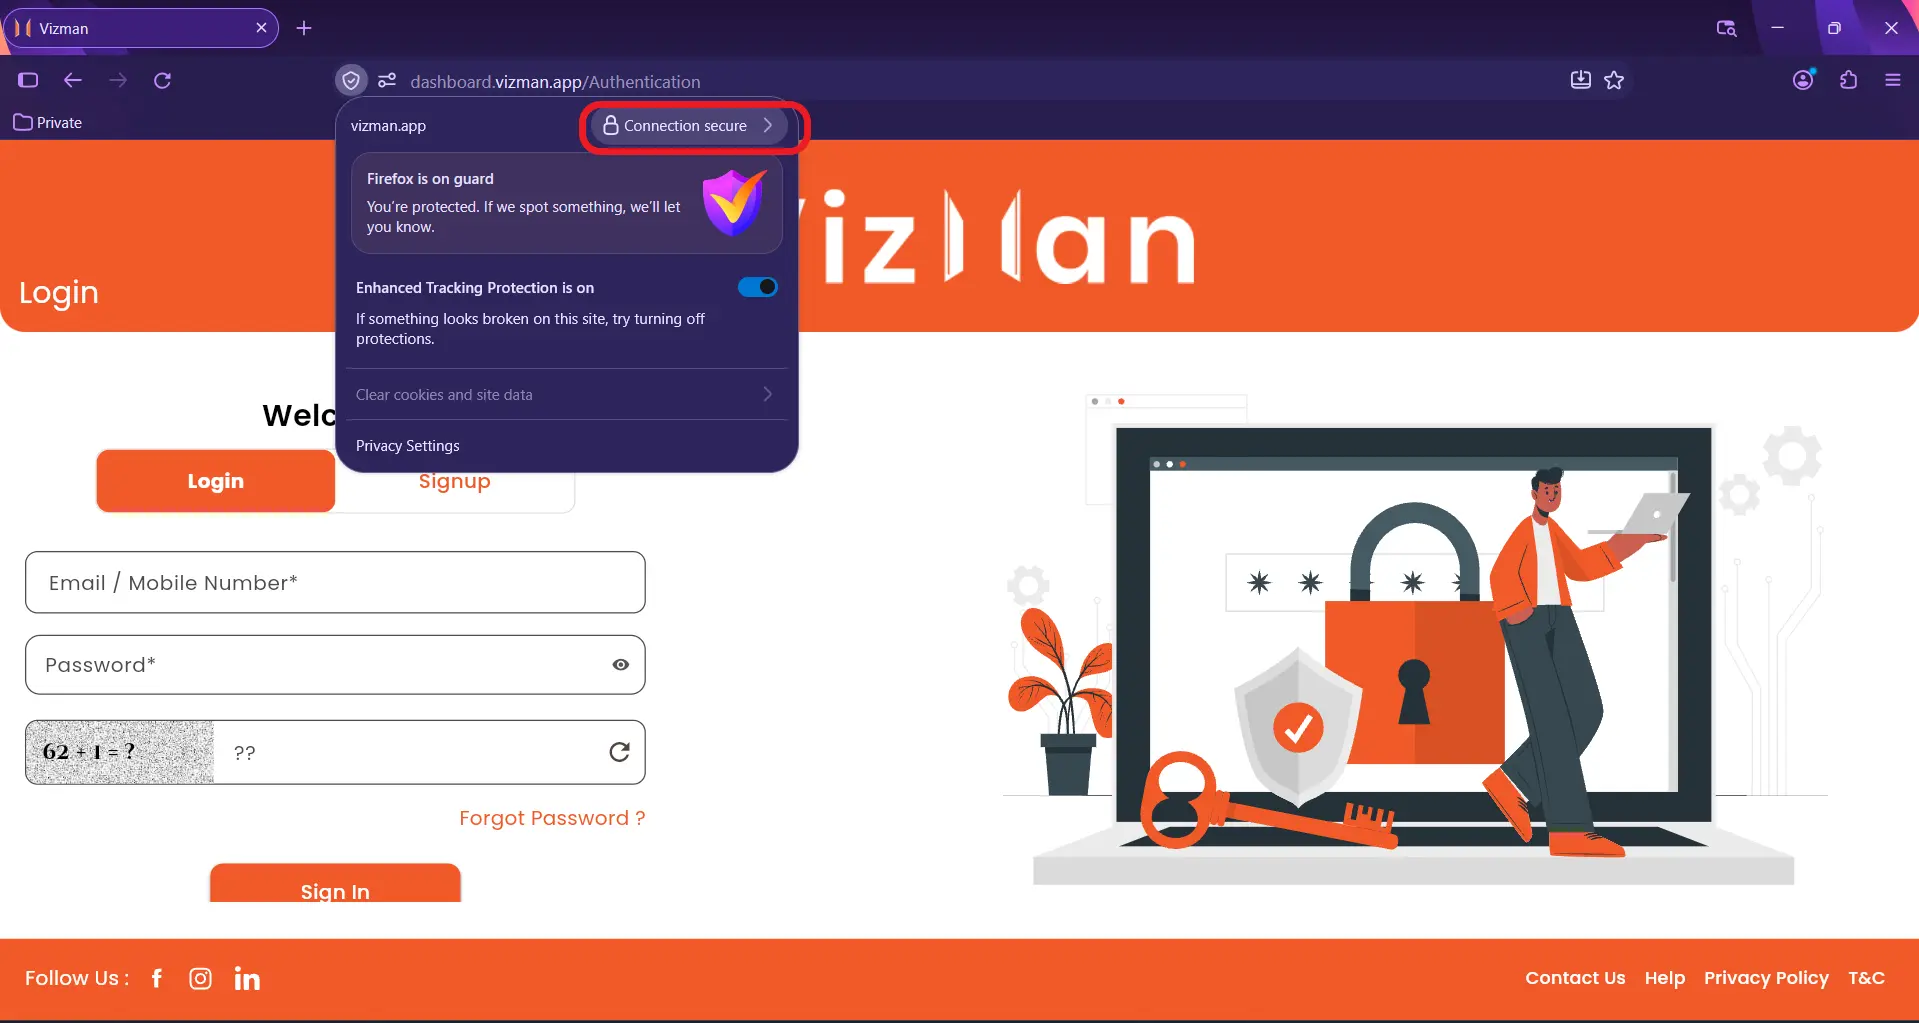
Step 2: Open the connection details
In the panel that opens, click Connection secure.
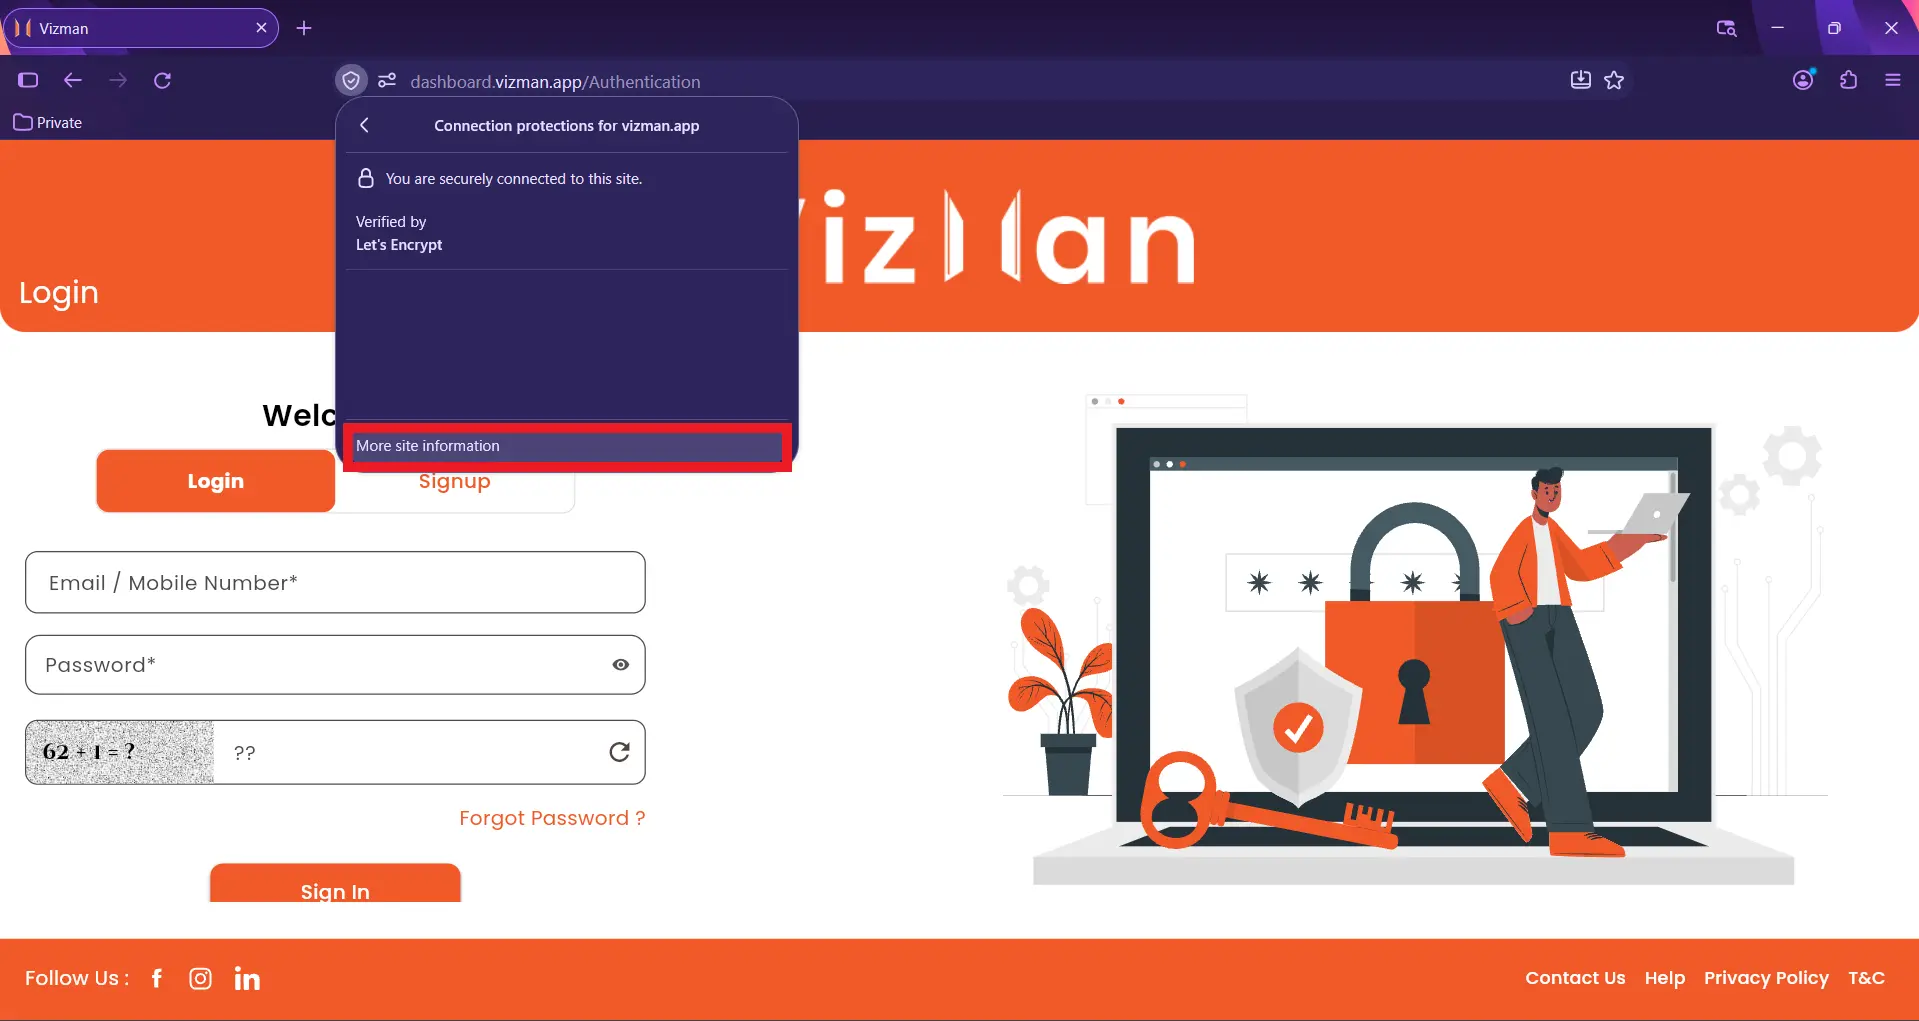
Step 3: Open more site information
Click More site information at the bottom of the panel. The Page Info window opens.
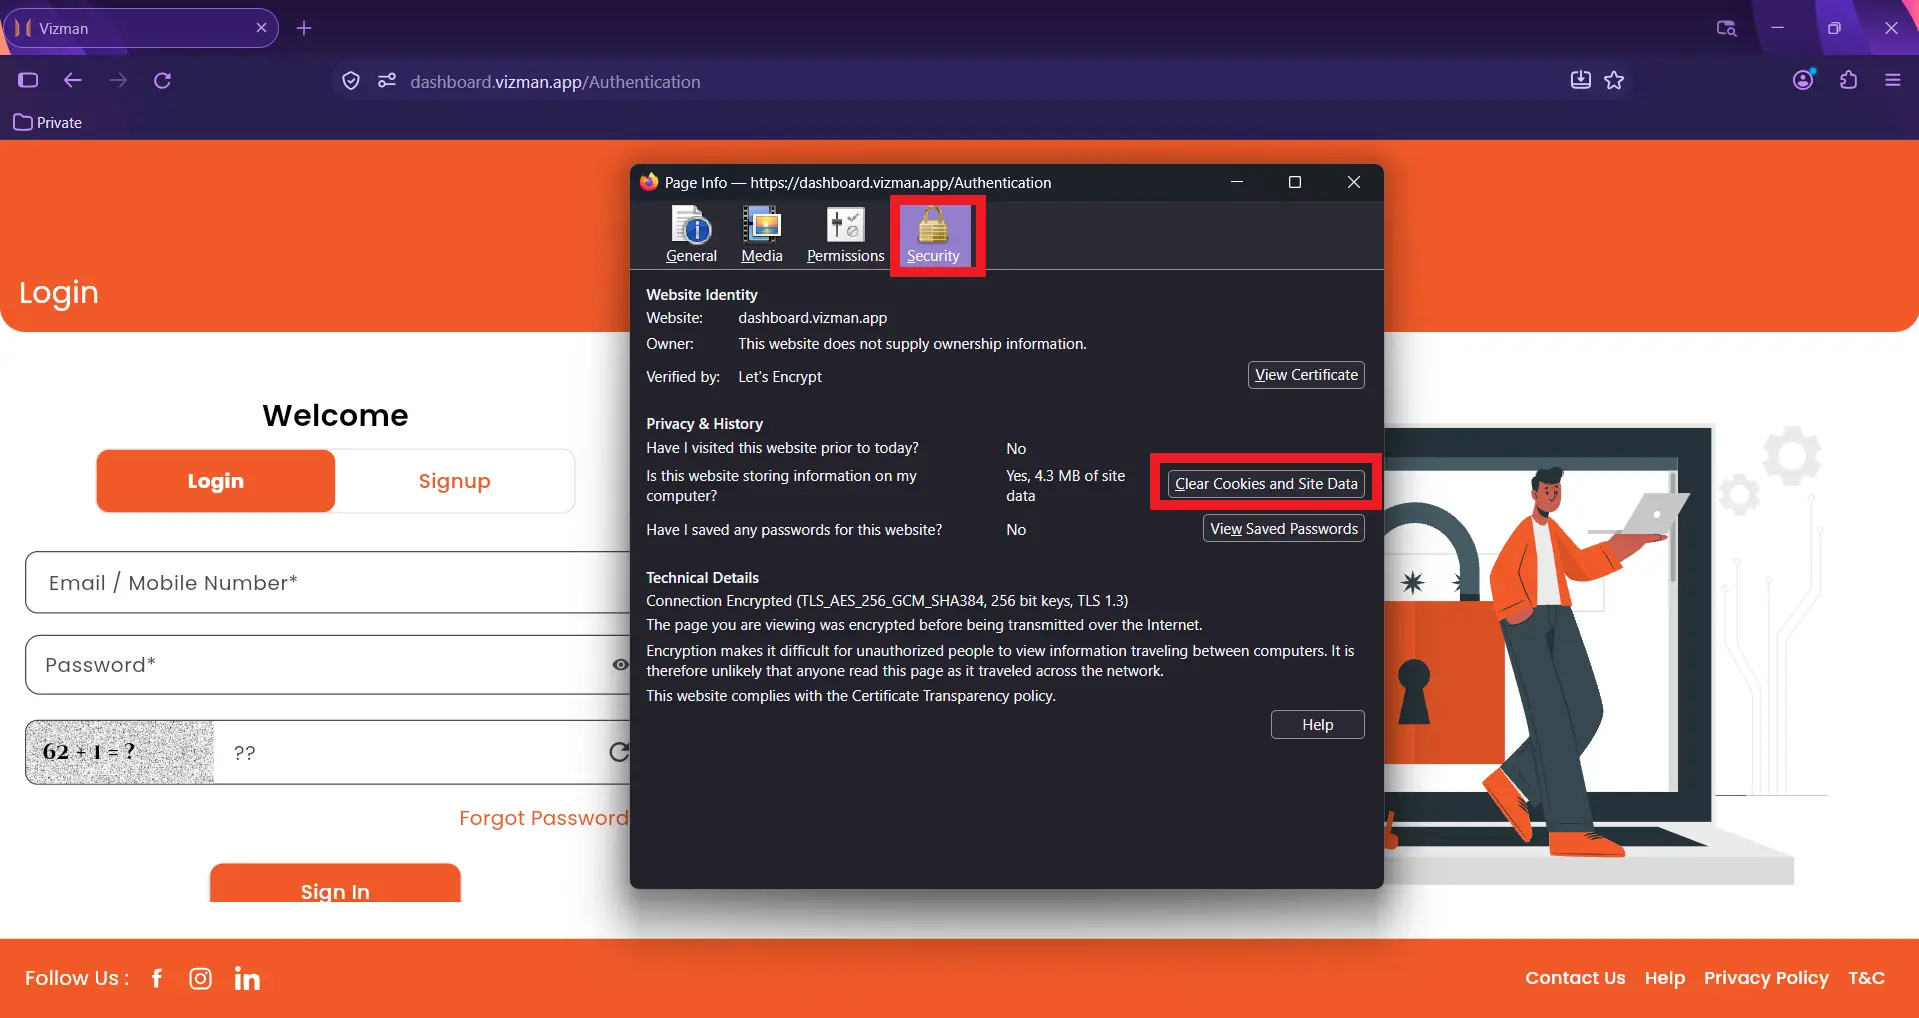
Step 4: Clear cookies and site data
In the Page Info window, select the Security tab, and then click Clear Cookies and Site Data.
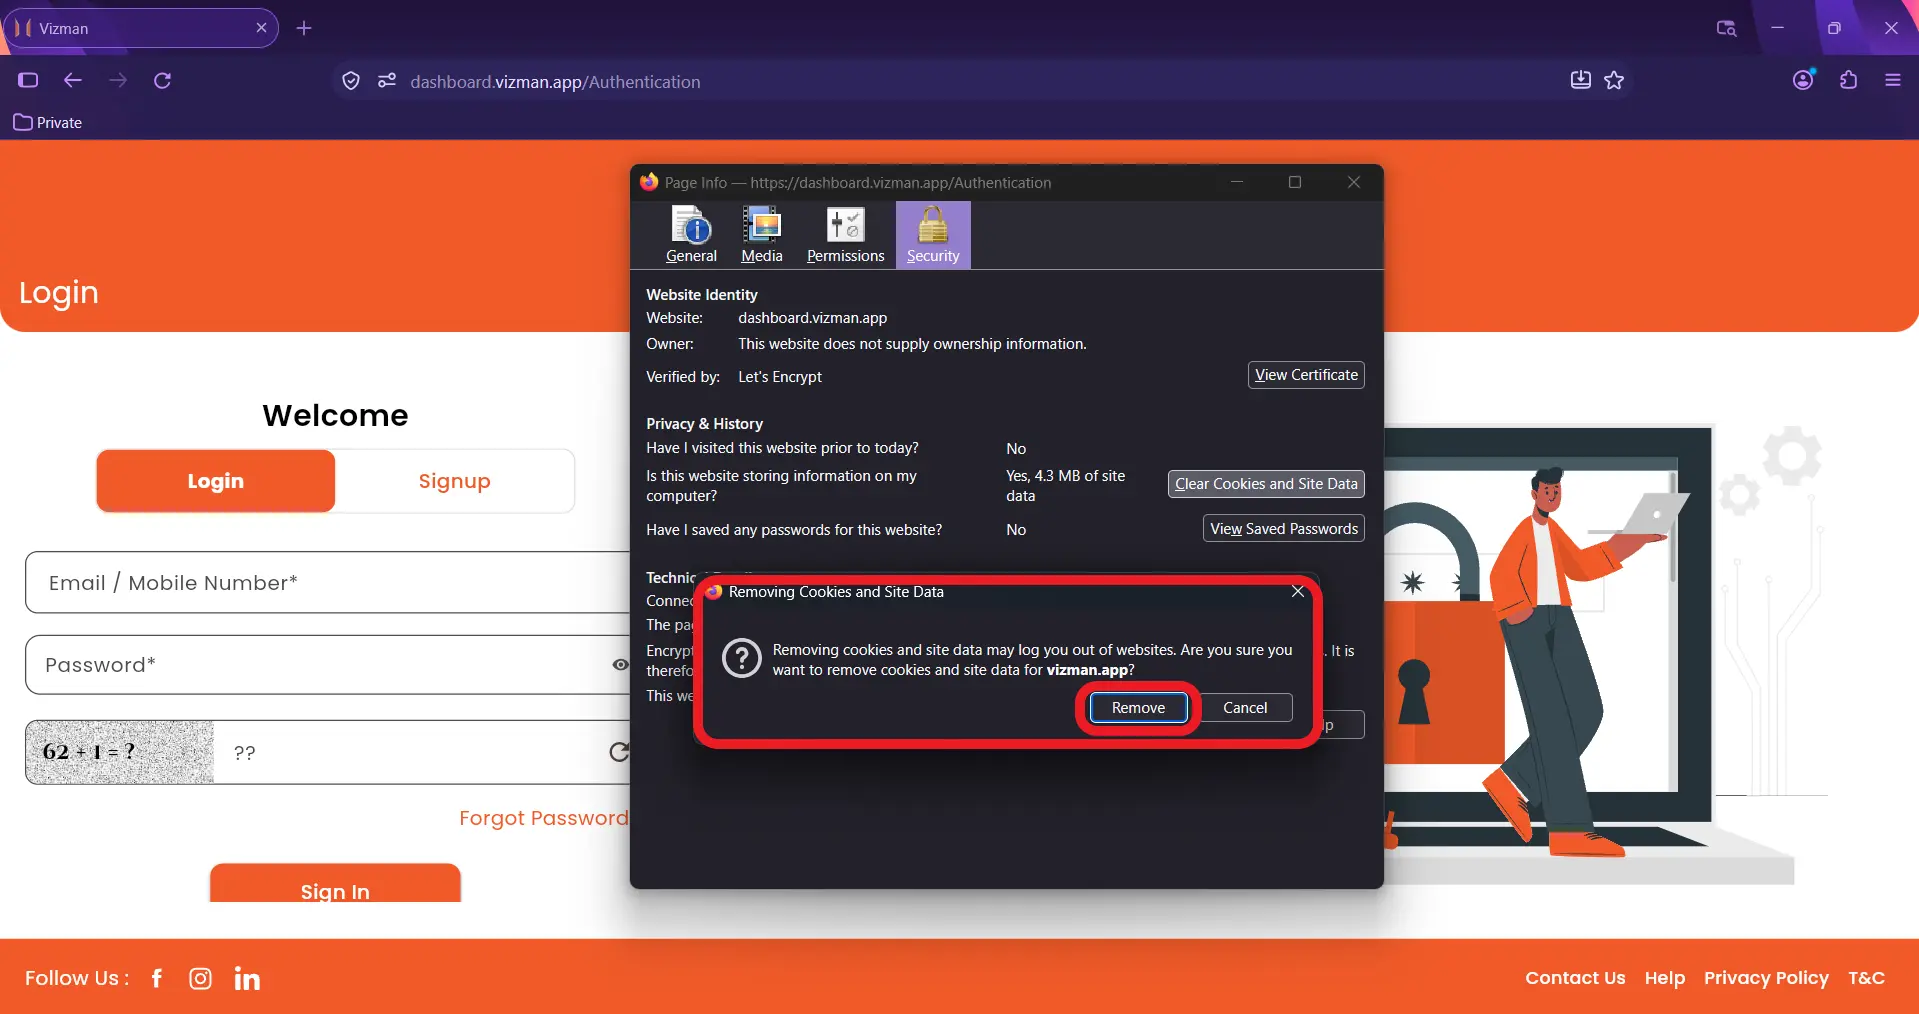
Step 5: Confirm the removal
In the Removing Cookies and Site Data pop-up, confirm that it shows vizman.app, and then click Remove.
Step 6: Reload the page
Reload the page, or perform a hard refresh by pressing Ctrl + Shift + R (Windows) or Command + Shift + R (Mac).
Method 2: From Firefox settings
- Click the menu button (three horizontal lines) and select Settings. On a Mac, you can also click Firefox in the menu bar and select Settings.
- Select the Privacy & Security panel and go to the Cookies and Site Data section.
- Click Manage Data.
- Type vizman in the search box to find the Vizman entries.
- Click Remove All Shown, then click Save Changes and confirm by clicking OK.
- Return to the Vizman login page and reload it, or perform a hard refresh as described above.
Completion
Once the page has reloaded, the stored cookies and site data for Vizman will have been removed, and you can sign in again as usual.
Still cannot sign in?
Open the login page in a private / incognito window. If sign-in works there, repeat the steps above for your browser and make sure both Vizman entries were removed. If it still fails, contact your Vizman administrator or support team.
